- Author: RhadigarTV
- Date: April 12, 2022
- Updated: May 10, 2022
- Expansion: TBC Classic


Welcome to Warcraft Tavern’s Guide to Zul’Aman for World of Warcraft: The Burning Crusade Classic! This 10 player raid includes 6 mandatory bosses, and is located in the Ghostlands Zone of Eastern Kingdoms. There are four bosses which which are avatars of different animal spirits in the raid, and defeating them all within 45 minutes of starting the raid will result in additional loot and the famed Amani War Bear mount. Each boss in the raid drops a Badge of Justice, and there is not Tier 4, 5 or 6 loot that drops from Zul’Aman. There is no attunement process to enter Zul’Aman, so many players will be able to participate ranging from Karazhan to Black Temple experience.
The role of this guide is to assist you and your raid members in understanding how to be prepared for entering into Zul’Aman by giving you an overview of each encounter, and providing detailed explanations of each boss.
Attunement Process
Unlike the previous raids in phases one through three, such as Mount Hyjal or Black Temple, there is no attunement required to gain access to the Zul’Aman raid. There is, however, a quest chain that can be completed within and around Zul’Aman.
- Oooh, Shinies!: Griftah wants you to take Griftah’s Note to Budd in the Ghostlands, just outside of Zul’Aman.
- Promises, Promises…: Budd Nedreck in Hatchet Hills wants you to retrieve his map from High Priest Nalorakk’s terrace in Zul’Aman. Upon completion this quest rewards you with Tattered Hexcloth Sack.
- X Marks… Your Doom!: Enter Zul’Aman and visit Halazzi’s Chamber, Jan’alai’s Platform, and Akil’zon’s Platform. Report the details of those areas to Budd, at his camp in the Ghostlands.
- Hex Lord? Hah!: Budd Nedreck in Hatchet Hills wants you to kill Hex Lord Malacrass in Zul’Aman.
- Tuskin’ Raiders: Prigmon needs you to collect 10 Forest Troll Tusks from the trolls in Zul’Aman. Bring them to him at Budd’s camp in the Ghostlands.
- A Troll Among Trolls: Prigmon has tasked you with locating and assisting his cousin Zungam, somewhere within Zul’Aman.
- Playin’ With Dolls: Take the Tattered Voodoo Doll to Griftah in Shattrath City.
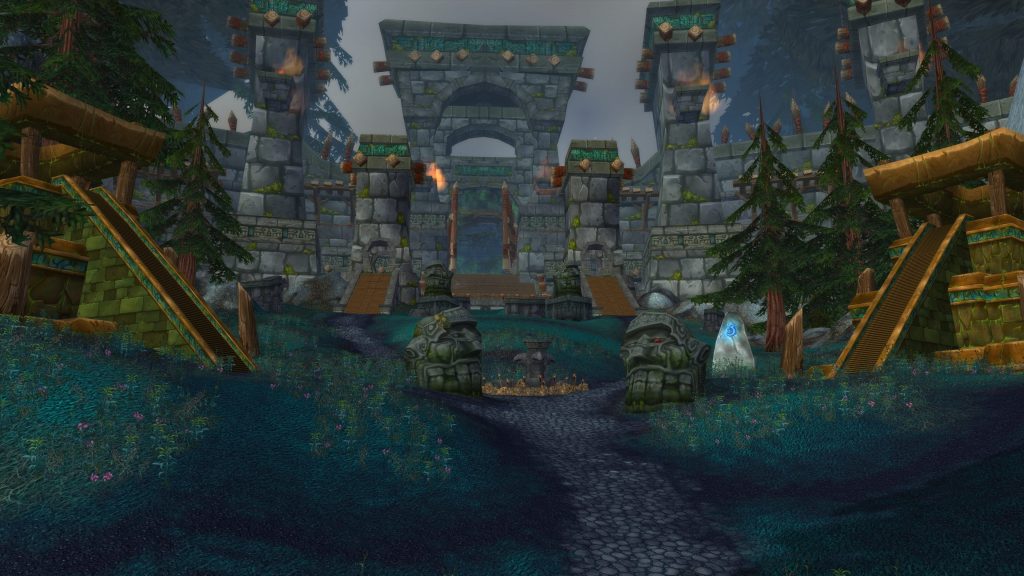
Entering Zul’Aman
Once you are at the gates of Zul’Aman, it is fairly simple to manage your way in, as the entrance is clear and there is no Attunement process.
For Horde players, making your way to the raid should be fairly easy, as the Ghostlands Zone is part of the leveling canon for Blood Elf players. Simply head south of the road from Tranquillien, head east past the Sanctum of the Sun and onward down the path to Zul’Aman.
For Alliance players, you very well may have never entered into the Ghostlands Zone before. In this case, fly in to Eastern Plaguelands and head north on the road which passes Eastwall and Northpass Towers. During World of Warcraft: Classic, this road had a dead end next to the Quel’lithien Lodge, but you may now pass through to the Ghostlands. Once you cross into the zone, follow the road to the north, and turn right into the Southeastern part of the zone.
For players of both Factions, there is a flight master awaiting to make your acquaintance near the entrance to the raid.
Raid Preparation
Zul’Aman is a 10 Man raid in The Burning Crusade Classic. All bosses are mandatory in order to defeat the second to last and final bosses, but the first four Loa, or Avatar type bosses, can be defeated in any order the group desires. The bosses available for the raid group to engage and defeat are:
Boss Encounters
Akil’zon
- Tanks:
- Akil’zon doesn’t hit particularly hard outside of Call Lightning — you can focus on DPS / threat gear & consumables for this fight.
- Help your healers out by using defensive cooldowns if they’re struggling to keep the raid alive.
- You will need to stack with the rest of the raid during Electrical Storm, the same as everyone else.
- Healers:
- Use nature resistance in the form of Aspect of the Wild or Nature Resistance Totem to mitigate damage in this fight and help to ease up on The main tank will generally not take a lot of damage during this fight, but watch out for Call Lightning
- The melee DPS will inevitably take more damage from Static Disruption and need more healing
- Watch out for people getting knocked into the air by Gust of Wind, they will take heavy fall damage upon landing
- Call out if you are getting overwhelmed by the raid damage, so that DPS players know they should kill the Soaring Eagles, reducing damage
- Ranged DPS:
- Don’t be at your maximum range from Akil’zon, just far enough from other players so you don’t zap each other with Static Disruption.
- Kill the Soaring Eagles if your healers are struggling to keep your raid alive — it’ll be a lot easier for you than melee DPS.
- Shadow Priests, Warlocks: Be very careful of your self-damage during this fight, try to do it when your healers can heal you.
- Melee DPS:
- As much as possible, try to stay away from other melee so you don’t constantly zap each other with Static Disruption.
- If your raid doesn’t stack in time for Electrical Storm, you won’t be able to DPS Akil’zon during the storm — don’t die trying to do so.
- Kill the Soaring Eagles if your healers are struggling to keep your raid alive.
Check out an in-depth breakdown in our Akil’zon Strategy Guide!
Nalorakk
- Tanks:
- Troll Form:
- Both tanks need to stack up in front of the boss here, with one tank main tanking while the second tank is a Brutal Swipe damage sponge.
- If you’re only using 1 tank, it’s recommended that you use mitigation gear & consumables, Brutal Swipe hits hard.
- Bear Form:
- If you’re using 2 tanks for this fight, the second tank needs to taunt and take over tanking, as Mangle makes his bleeds very dangerous.
- Consider using defensive cooldowns to help your healers out when you have both bleed effects at once — Lacerating Slash & Rend Flesh.
- If you’re using a single Protection Paladin tank strategy, use Divine Shield when you have both bleeds, so you remove them & Mangle.
- Blessing of Protection will remove Lacerating Slash & Rend Flesh, but not Mangle.
- After he reverts to his troll form, the original tank needs to taunt and take over tanking, while the bear form tank soaks Brutal Swipe again.
- Troll Form:
- Healers:
- Troll Form:
- Nalorakk’s damage is pretty low so you could help DPS him down during this phase.
- Make sure both tanks are above 50-60% HP at all times however, to avoid accidental Brutal Swipe.
- He uses Surge pretty infrequently, so you can just throw a HoT effect on anyone hit by it and let it heal them up.
- After the first troll form, you’ll have to heal the offtank more as he has the Lacerating Slash debuff from the previous phase.
- Bear Form:
- Nalorakk’s tank damage increases significantly here, while his raid damage gets even lower.
- Spam heal on the main tank if they have both bleed effects at once — Lacerating Slash & Rend Flesh.
- Nalorakk will typically silence you after putting both bleeds on the main tank, so make sure they have heal-over-time effects.
- Troll Form:
- Ranged DPS:
- Use your personal DPS cooldowns during Heroism / Bloodlust for maximum DPS, while Nalorakk is in his troll form.
- Don’t be at your maximum range from Nalorakk – he will knock you very far away with Surge.
- Casters: Nalorakk will repeatedly silence in his bear form, so it’s strongly advised that you save your cooldowns & trinkets for his troll form.
- Melee DPS:
Check out an in-depth breakdown in our Nalorakk Strategy Guide!
Jan’alai
- Tanks:
- Main Tank:
- Keep the boss in the middle of his platform as much as possible, so people can spread out better.
- You may need to move slightly to avoid Fire Bombs or in order to allow melee to keep DPSing if Fire Bombs spawn directly behind him.
- Move back to the middle of his platform after Fire Bomb.
- Use major defensive cooldowns and trinkets after Jan’alai Enrages, at 20% HP.
- It’s recommended that you use defensive consumables to survive the Enrage, particularly if your gear isn’t great.
- Off-tank:
- When Hatchers spawn, quickly move towards the platform of the Hatcher you are sparing, and wait just before the bridge.
- Pick up the Amani Dragonhawk Hatchlings & the Hatcher as they come and keep them there.
- At 35% HP, Jan’alai will hatch all remaining eggs, though this should be 0 unless your group has made a mistake.
- You’ll need to be ready for that, and pick up the Hatchlings ASAP — you may have to tank up to 20 at once, so use defensive cooldowns.
- Main Tank:
- Healers:
- Jan’alai doesn’t do a lot of damage to the tanks at first, but do not lose focus.
- Quickly heal off Flame Breath damage on the raid so players don’t accidentally die to Fire Bomb, and vice versa.
- Be prepared to heal the off-tank as they pick up the Amani Dragonhawk Hatchlings.
- Move towards the off-tank if you accidentally get threat on any Amani Dragonhawk Hatchlings.
- Pump heals on the main tank after Jan’alai Enrages at 20% HP.
- Ranged DPS:
- Use your personal DPS cooldowns during Heroism / Bloodlust for maximum DPS, after you defeat the first wave of Amani Dragonhawk Hatchlings.
- Kill the Amani’shi Hatcher that your raid designates as the kill target, spare the other one.
- Wait for the off-tank to get some threat on the Amani Dragonhawk Hatchlings, then AoE them down.
- If the opposite side is struggling with adds, go help them, but be careful while moving there — don’t get hit by bombs or hit others with fire.
- Melee DPS:
- Melee DPS should simply focus on keeping up their DPS rotation to maximize damage output, and watch your threat!
- Spread out behind the boss to avoid taking too much damage from effects that target other melee group members.
- Be prepared to move around the platform, avoiding the Fire Wall, Fire Bombs, and Flame Breath.
Check out an in-depth breakdown in our Jan’alai Strategy Guide!
Halazzi
- Tanks:
- This fight should be approached with two tanks, one for Halazzi, and one to pick up the Spirit of the Lynx.
- Both tanks will stack in the tanking position, in order to split up damage from Saber Lash.
- Healers:
- Shock and Earth Shock abilities by standing 30 yards away from the boss.
- Keep an eye out for players in the raid effected by Flame Shock and dispel the damage over time debuff.
- Keep up raid healing, as members of the group will take damage from Lightning , Earth Shock and Flame Shock.
- Melee DPS:
- Melee DPS should focus their output on Halazzi throughout the fight, and switch to the Corrupted Lightning Totems whenever they spawn.
- Melee DPS should focus their output on Halazzi throughout the fight, and switch to the Corrupted Lightning Totems whenever they spawn.
- Ranged DPS:
- Ranged DPS simply need to pick a spot 30 yards away from the boss to avoid Flame Shock and Earth Shock, and keep up their DPS rotation.
Check out an in-depth breakdown in our Halazzi Strategy Guide!
Hex Lord Malacrass
- Tanks:
- This fight is typically approached with two tanks, one for Hex Lord Malacrass himself, and the other for the adds at the beginning of the fight.
- The off tank should pick up any adds that are not being CC’d, allow for DPS to focus on them, pick up the adds that were CC’d, and then move on to the main boss with the rest of the group.
- When tanking Hex Lord Malacrass, be aware of AoE effects like Consecrate and Rain of Fire, which the boss will need to be positioned outside of.
- Whenever Hex Lord Malacrass Siphon Souls a Hunter, be sure that you position him where you or the melee group will not trigger a trap.
- Healers:
- Spirit Bolts are the primary damage dealers in this fight, as everyone will take 9000 damage simultaneously. Healers need to be not only aware of when it is time to heal through this mechanic, but need to ensure everyone in the raid is already topped off.
- Hex Lord Malacrass is able to use the Priest spell Mind Control when he gains abilities of a Priest through Siphon Soul. However, Shamans and Priest are able to dispel it.
- Encourage your group to use Crowd Control on the adds at the opening of the fight to put some ease on healing early in the fight.
- Ranged DPS:
- Focus down the adds before changing to the boss, but be aware of which adds are being effected by Crowd Control Spells. Many groups with high caliber players will simply choose to stack and cleave/seed the four adds, but this is not an easy task.
- Mages and Shamans should use their abilities (Spellsteal and Purge) to remove the effects of Lifebloom and Avenging Wrath from Hex Lord Malacrass.
- Melee DPS:
- The primary focus for Melee DPS should the adds, and moving on to the boss upon their demise.
- Rogues, Warriors, and Shamans need to be especially aware of what abilities Hex Lord Malacrass is gaining throughout the fight, and to focus on interrupting anything possible.
- Stay out of ground AoE effects like Consecrate or Rain of Fire, and keep away from the Hunter Traps.
Check out an in-depth breakdown in our Hex Lord Malacrass Strategy Guide!
Zul’jin
- Tanks:
- Only a single tank is required for this fight, and your off tank is better served fulfilling a DPS or Healing role instead for the encounter.
- In bear phase, Zul’jin’s Overpower ability will deal a decent amount of damage.
- The tank will not be needed for the Eagle Phase of the encounter, as Zul’jin does not have a threat table in Eagle Form.
- Healers:
- Healers will need to pay attention to the mechanics as they change throughout the fight. In Troll Phase, the boss’s Grievous Throw ability will target a random player of the raid, dealing 5000 physical damage as well as place a bleed effect on them. This debuff will not go away until the target is healed to full health.
- In bear phase, Zul’jin’s Overpower ability will deal a decent amount of damage, so be ready to focus up on the Main Tank.
- Creeping Paralysis is an ability during Bear Phase that will stun effected players. Priests and Paladins can dispel it, and the Rogue’s Cloak of Shadows will do the trick as well.
- The Lynx Phase will probably be the most healing intensive, because the boss’s Lynx Rush ability will effect the entire raid with a bleed and the Claw Rage will target a random member of the raid dealing significant damage.
- Melee DPS:
- Be sure to move away from the boss when he uses his Whirlwind during troll phase.
Check out an in-depth breakdown in our Zul’Jin Strategy Guide!
About the Author


