- Author: Furious
- Date: May 19, 2020
- Updated: October 10, 2020
- Expansion: WoW Classic
Welcome to our raid guide for Naxxramas in WoW Classic! Naxxramas is located in Eastern Plaguelands and is the final raid of WoW Classic, home to Kel’Thuzad and his army. This 40 main raid is massive, featuring 15 bosses across five separate wings. You’ll need a group of well-geared raiders to effectively clear most bosses in the raid and precise play if you want to kill all 15.
For a full list of items that can be acquired please see our WoW Classic Naxxramas Loot List!
Naxxramas features several diverse fights that progress in difficulty, but the best part is the loot. Bosses drop tokens for T3 equipment sets, shoulder enchants, and pieces of the legendary staff, Atiesh, Greatstaff of the Guardians. You’ll need to clear through the raid several times to gear your whole raid out in T3 sets.
This guide was made to help you do that. We’ll cover several topics below, including how to get attuned to Naxxramas, how to enter it, the clearing route you should follow, how to prepare for the raid, and detailed strategies for each encounter. There’s a lot to cover and learn, but it will make you much more equipped to tackle each fight within Naxx. Let’s get started with the attunement process!
Attunement
Before entering the raid, you’ll need to complete a simple attunement quest. Go to Light’s Hope Chapel in Eastern Plaguelands and accept the quest: The Dread Citadel – Naxxramas from Archmage Angela Dosantos. You can finish the quest with at least honored reputation with the Argent Dawn, but it comes at a cost. The price decreases as your reputation level rises.
At exalted with the Argent Dawn, you can complete the quest for free. Being revered will require 30 Gold, Arcane Crystal x2, and a Nexus Crystal. If you’re only honored, then you will need to pay 60 Gold, Arcane Crystal x5, Nexus Crystal x2, and a Righteous Orb.
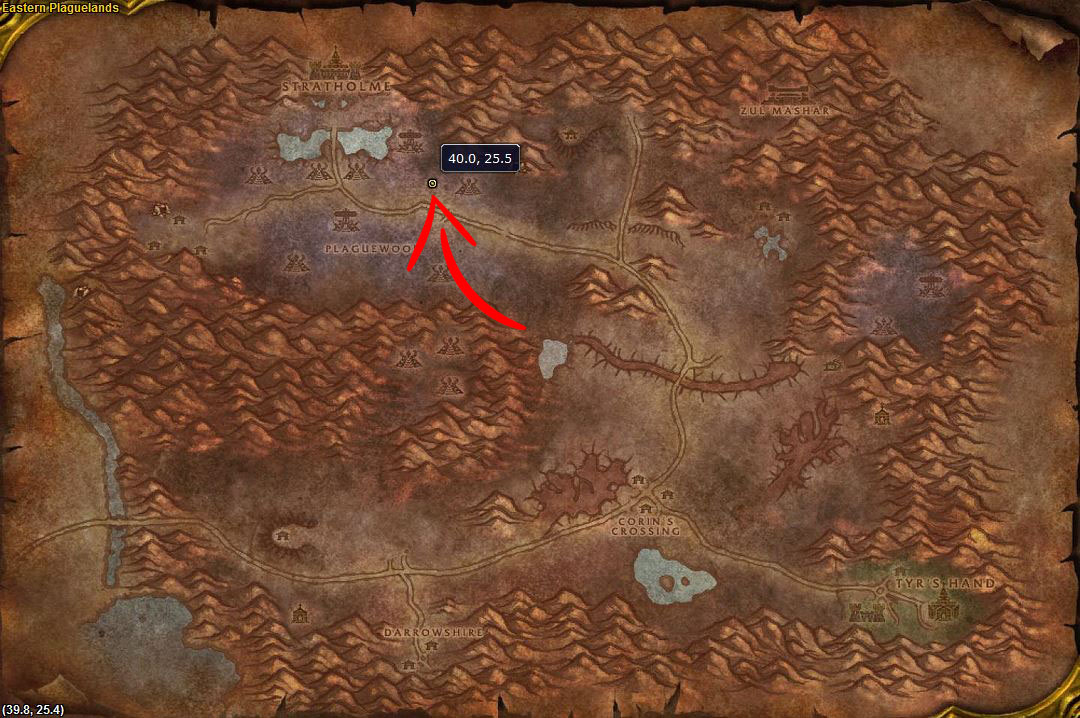
Once you have the right materials for your reputation level, simply hand the quest in to complete attunement. After completion, you will have the ability to use the teleporter in Plaguewood to reach Naxxramas
Location
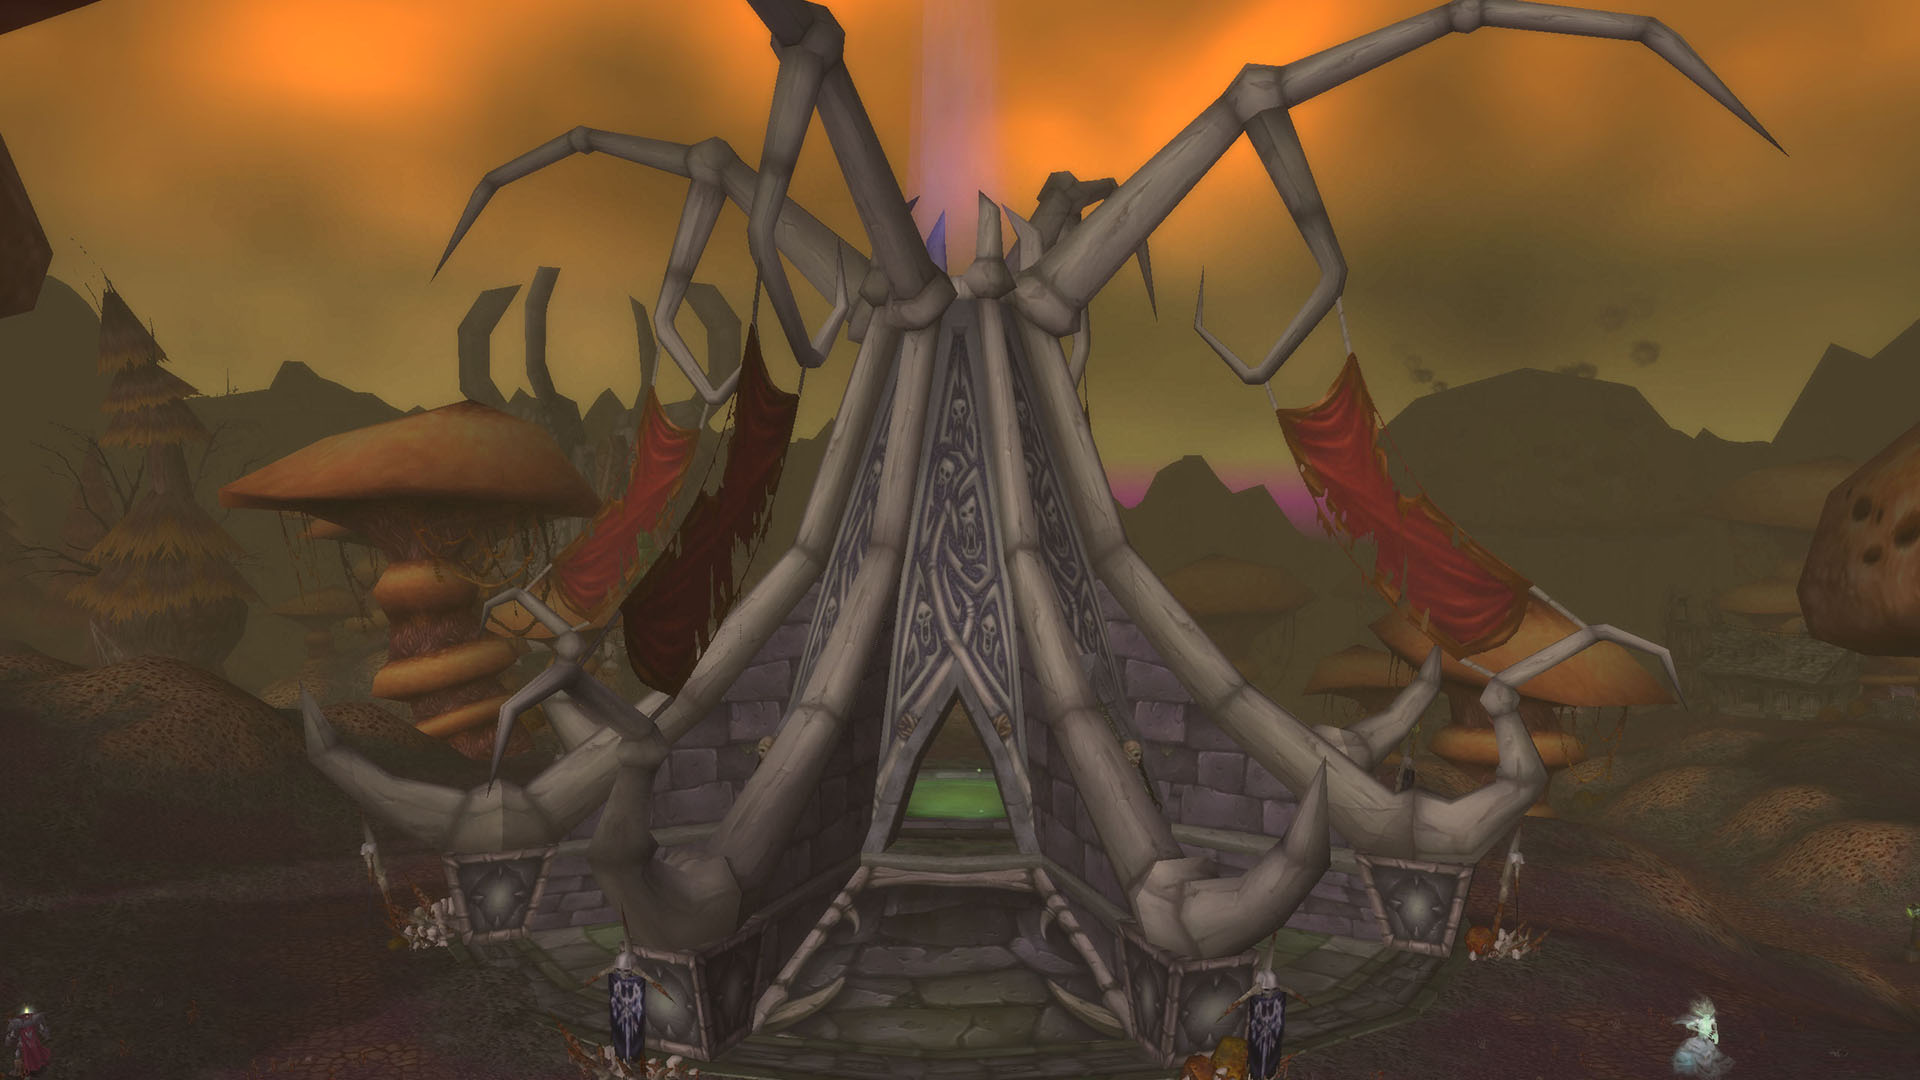
After you’ve completed attunement, you can enter Naxxramas by heading to the center of Plaguewood and using the teleport spire there. Below is a picture of the teleporter and the path you should take from Light’s Hope Chapel to reach it.
Navigating Naxxramas
Naxxramas is not a linear raid and consists of several different wings. You can enter four wings to begin with (Abomination, Death Knight, Plague, and Spider) and the final bosses will unlock once all other bosses have been killed.
This means that you can technically start and clear through the first four wings however you’d like, but must kill the bosses in each wing in the correct order. For simplicity’s sake, we’ve outlined the wing and boss clear order you should follow below, starting with the easiest fights first.
- Abomination Wing (Patchwerk > Grobbulus > Gluth > Thaddius)
- Plague Wing (Noth > Heigan > Loatheb)
- Spider Wing (Anub’Rekhan > Faerlina > Maexxna)
- Death Knight Wing (Razuvious > Gothik > Four Horsemen)
- Sapphiron > Kel’Thuzad
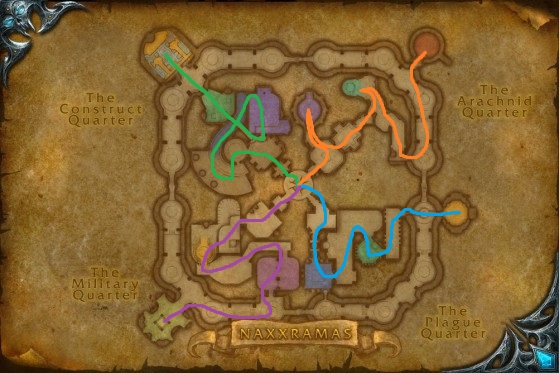
Head toward the Abomination Wing first (green path) and start fighting your way through to find each boss within. Repeat this for each wing until you’ve cleared the first four wings. The clear route should go: green path, then blue path, then orange path, and finally the purple path. At this point, you’ll need to use the center teleporter to reach the Frostwyrm Lair. After killing Sapphiron, you can enter Kel’Thuzad’s Chambers in the room behind him.
Raid Preparation
Naxxramas is a highly difficult raid due to the gear requirement it has. Your entire raid group will need a minimum of T1 armor on all 40 raiders, with T2 and T2.5 making things much easier. In addition, you’ll need a special composition including several tanks, healers, and specific classes.
To top things off, resistance gear and consumables for nature, frost, shadow, and fire is a necessity. As you can imagine, this will take several weeks of clearing through previous raids to be adequately geared for Naxx.
To summarize:
- Attunement: Honored with Argent Dawn or higher.
- Gear: T1 or higher. All pieces should be epic and offer useful stats for your class. Tanks will need backup resistance gear for nature, frost, shadow, and fire damage. Melee DPS should have fire and nature resist gear if it also offers offensive stats. All raiders will need a set of frost resist gear for Sapphiron.
- Raid Composition: (at least) 4 tanks, 8 healers, 6 mages, 4 hunters, 2 druids, 6 priests, 2 rogues, 2 shamans/paladins, rest should be a mix of ranged/melee DPS prioritizing ranged.
- Special Consumables: Greater Frost Protection Potion, Greater Nature Protection Potion, Greater Shadow Protection Potion, Greater Fire Protection Potion, Whipper Root Tuber, Heavy Runecloth Bandage
Trash Mobs
Trash mobs vary based on the wing you’re in. Each wing will have trash mobs that are thematically similar to the bosses in that wing. None are particularly difficult, but going slow and steady, taking just one pack at a time is your safest best of clearing through the raid. The Abomination Wing entails the greatest damage output, but is still entirely manageable with single-pack pulling.
Boss Encounters
There are a total of 15 boss fights in Naxxramas. The Abomination Wing has four bosses, the Death Knight Wing holds three, the Plague wing has three, the Spider Wing also has three, and the final two bosses have connected rooms that unlock after killing the other 13 bosses. Aside from KT, none of the fights are insanely difficult if you have decent gear. Look below to find a strategy guide for each wing and corresponding bosses found within!
Abomination Wing
Patchwerk
Patchwerk is certainly the easiest fight in the raid because it involves minimal mechanics and is the premier example of a tank-and-spank. There is just one ability to watch for; Hateful Strike, which will deal massive damage to whoever is in melee range with the most health (won’t hit the main tank). To deal with this, you simply need to have an offtank or two soak this hit so that melee DPS don’t die.

Aside from that, you’ll start the encounter by bringing Patchwerk to a corner to make positioning easier. Place your offtanks in front of the boss and have the melee to Patchwerk’s side. Once you’re in position, simply burn the boss down, making sure to quickly heal offtanks that are hit by Hateful Strike.
As a final thing to watch for, Patchwerk has a built-in enrage timer. After 7 minutes, he will go Berserk and begin one-shotting the raid. This makes him a DPS race, but it shouldn’t be difficult considering the lack of mechanics. When he has 5% health left, he will also Enrage, meaning that you should have cooldowns ready to burst through his remaining health.
Grobbulus
Grobbulus is a little trickier, considering that your melee DPS won’t be very useful here. This is primarily because of Poison Cloud, dealing heavy damage to all targets within 10 yards of the boss. With this in mind, the more ranged and caster DPS in your group, the easier this fight will be.

Another consideration is that the fight entails a high amount of nature damage. To help mitigate this, you should have hunters use Aspect of the Wild and shamans place Nature Resistance Totems and Poison Cleansing Totems.
You’ll start the fight by pulling Grobbulus and beginning to slowly drag him around the edges of the room. Your tank should continue moving throughout the whole fight as Poison Cloud will linger on the ground and make it unsafe. Make sure that only the tank is in front of the boss because he will cast Slime Spray often, dealing significant damage and spawning a Fallout Slime for each target hit.
With only a single target hit by Slime Spray, a singular slime will spawn, typically near your healers. These should be killed by the melee DPS that have no other responsibilities. As the fight continues, the boss will also use Mutating Injection periodically. This lasts for 10 seconds, dealing heavy AoE damage upon expiration and leaving a poison cloud.
Whoever is targeted must run away from the raid to drop the cloud. It will deal less damage if it is cleansed. When Grobbulus reaches 30% health, he will cast Mutating Injection more frequently and on multiple players. This makes the rest of the fight a close race, meaning that you should save cooldowns for this phase. The last thing to watch for is an Enrage that happens at 12 minutes.
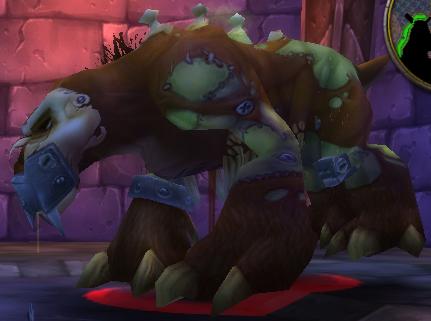
Gluth
Gluth is a pretty simple fight requiring two tanks. Pull the boss by the door and position him so that he is facing the door. He uses a frequent stacking debuff; Mortal Wound, that reduces incoming healing by 10%. Have your tanks switch aggro when you have 4 or 5 stacks to avoid a death.
Another consideration is Terrifying Roar, used every 20 seconds and fearing targets within 20 yards. As this can hit your tanks, you should have priests ready to always have Fear Ward on the main tank to avoid losing positioning. You’ll also need hunters in the group to use Tranquilizing Shot when he uses Frenzy every 10 seconds.
Beyond this, the main mechanic to deal with here are zombie spawns, which must be kited using slowing abilities like Frost Trap from hunters and Cone of Cold from mages. They will appear every 10 seconds and all packs must be kited until Gluth uses Decimate.
He uses this ability every 105 seconds, meaning that slowing abilities will need to be refreshed multiple times to keep zombies slowed. When Decimate is used, all zombies will be dropped to 5% health and start running toward Gluth. If they reach him, they will disappear and heal him. To combat this, you should have all DPS AoE them down as soon as Decimate is used.
Zombies are not terribly strong initially, but they have power in numbers and use Infected Wound. This is a stacking buff that increases physical damage. It’s important that your dedicated kiters are careful to avoid getting hit as a quick death is likely. Assign at least two kiters to ensure no zombies run free.
Simply continue kiting zombies and killing them after Decimate until Gluth dies. Know that he will Enrage after the third Decimate, meaning that there is a DPS race involved with the encounter.
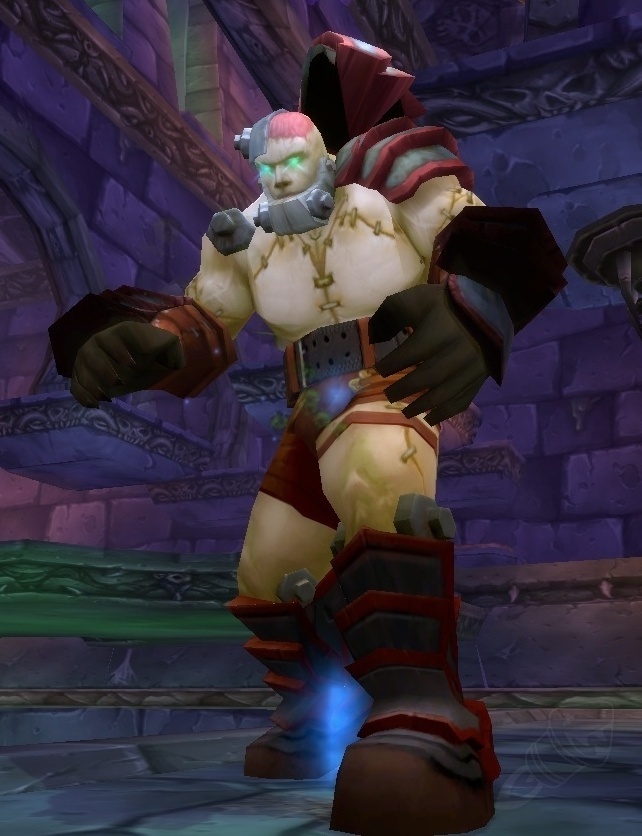
Thaddius
Thaddius consists of two phases and may seem a little confusing, but he’s fairly straightforward once you understand the mechanics. We’ll separate each phase into a breakdown below.
Phase One
The fight begins by attacking two sub-bosses, Feugen and Stalagg. Each boss is on a platform on opposite sides of the room, which means that you’ll need to split your raid into two groups. Split your healers into two equal groups and add a tank to each. Separate your DPS by ranged/casters and melee to finalize your two groups.
The group with ranged/caster DPS should attack Stalagg while the melee group attacks Feugen. When you start the fight, your tanks must hold the boss by the nearby lightning rod to avoid changing lightning to the raid group. After 20 seconds, your tanks will be forced to switch platforms. Let up on DPS to allow the new tank to gain threat on the boss and then resume DPSing until another switch occurs.
Feugen and Stalagg are fairly similar, but Stalagg does more damage. Both bosses do an AoE stomping ability for moderate damage. Stalagg can also buff himself to attack significantly faster and his attacks are always crushing blows, meaning that healers should be ready to overheal and the tank holding him should use defensive cooldowns. Feugen does not have this ability, but drains the mana of all targets nearby instead.
To finish this phase, you must kill both sub-bosses within a few seconds of each other or they will resurrect and you must restart. Once they die, prepare to jump off the ledge onto the platform below. Ensure that you jump near the edge of the platform so that you make the jump or use a Swiftness Potion for safety.
Phase Two
Now the encounter with Thaddius actually begins. Once again, the raid will be split into two groups. What’s different this time is that the groups will be determined by polarity. Each group must stand on one side of the boss to avoid damaging other raid members. This is determined by Polarity Shift.
Polarity Shift assigns a charge to a player, either positive or negative. Positive players must all stand on one side of the boss while negative players stand on the opposite side. For simplicity, you can assign positive players to the west and negative players to the east. Standing by raid members with the opposite charge will damage both you and them. On the other hand, standing by other similarly-charged players will boost both of your damage outputs.
It’s imperative to always be standing on the right side with other players of the same charge. What makes this trick is that Thaddius uses Polarity Shift every 30 seconds. When your polarity shifts, you must run to the other side to avoid damaging other players. You should run directly through the boss to get there quickly as there is a 5 second grace period before the damage effect starts.
Polarity is the only mechanic to deal with here, but it directly affects whether you wipe or kill the boss. Thaddius has a 5 minute Enrage timer from the moment you start phase two, which is entirely doable if you’re making the most of the damage boost from polarity stacking. Furthermore, he doesn’t do much damage so a few healers can feel free to DPS to help speed up a kill. Keep switching sides when he uses Polarity Shift and burn him down until he dies.
Plague Wing
Noth the Plaguebringer
Noth the Plaguebringer is a decent encounter that has multiple mechanics to deal with. You’ll need three tanks for the fight and plenty of mages and druids to use decursing spells. Noth will target a player and cast Curse of the Plaguebringer on them, which is harmless but causes Wrath of the Plaguebringer if not dispelled in time. Wrath of the Plaguebringer is an instant wipe, infecting the whole raid and dealing shadow damage every 2 seconds. With this in mind, you need druids and mages ready to decurse as soon as Curse of the Plaguebringer goes out.

Throughout the fight he will also spawn skeletons, blink away, and teleport to safety. Skeletons appear every 30 seconds and should be picked up by the offtanks. These should be DPSed by ranged and casters until they die. His Blink occurs every 25 seconds and drops all aggro. At this time, DPS should cease until the main tank can pick him up again. When he uses Blink, he will also cast Cripple, slowing any targets that were around him when he initially casted Blink.
This means that the main tank will be slowed, which means a priest or paladin should be prepared to remove it. Any time a Blink/Cripple combo is cast, be prepared to cleanse the tank and have them use a gap closer like Intercept to quickly grab aggro. Finally, Noth will use his teleport at regular intervals.
The first teleport will happen after 90 seconds. Noth will teleport to his balcony and cannot be attacked. During this time, two waves of adds will spawn. Kill them and Noth will come back down (or after 70 seconds have passed).
The second teleport happens 110 seconds after Noth returns from his first teleport. This time, more adds will spawn. Kill them again to bring Noth back (or after 90 seconds).
The final teleport happens 3 minutes after he returns again. Kill the adds he spawns again and you should now kill him before he ever teleports again. Remember to remove Curse of the Plaguebringer and the fight should be fairly straightforward.
Heigan the Unclean
Heigan the Unclean is a fun encounter that requires a bit of dancing skills. It’s broken up into two different phases that rotate and repeat every 135 seconds. Phase one is always 90 seconds and phase two will last 45 seconds. We have explanations for each section below.

Phase One
The first phase is the time when you can DPS. Heigan will attack the tank and should be out in front of his podium. All ranged, casters, and healers should stand on the podium for safety. In the rest of the room, the boss will cast Eruption. This causes major damage if you are hit by it. However, the pattern of Eruption is predictable and easily avoided.
Eruption happens every few seconds and goes around the room, leaving a safe spot in quarter sections. The first safe spot will be in the left portion of the room when facing the podium. The next safe spot is to the right of that, between the halfway mark in the room and halfway between the first safe spot’s wall and the middle of the room.
Safe spot number three is between the middle of the room and halfway between the wall to the right of the podium when facing it and the middle of the room. The final safe spot is in the area to the right of the podium when facing it. This cycle will then go backwards. After safe spot number four, you’ll go to the third safe spot and then the second.
Eruption is fairly slow during phase one and is easily avoided. The other mechanics to watch for include a mana burn to all nearby targets, a debuff; Decrepit Fever, and a teleport. His mana burn is easily managed by keeping all ranged, casters, and healers on the podium. Decrepit Fever can be cleansed, meaning that a few priests or paladins should be ready to remove it at all times.
Heigan’s teleport sends a few players to the gauntlet before his room. Simply run through it and get back to the boss room before phase two or poison clouds will surely kill anyone still in the tunnel. After 90 seconds, phase two will begin.
Phase Two
Phase two is the famous Heigan Safety Dance. At this point, Heigan will teleport to the podium and begins casting Eruption rapidly. The safe spot resets to the first area again during this phase and follows the same pattern as phase one. Go from safe spot one to four chronologically, then trace your steps backward.
Ranged DPS and casters can hit Heigan during this phase as long as they’re still properly moving. The boss won’t use any other spells during this phase and will only use Eruption until 45 seconds have passed. After, phase one resumes and the safe spot becomes the first section again. Make sure to run back onto the podium and follow the Eruption patterns to avoid dying. Cycle through his phases, doing DPS all the while, until he drops.
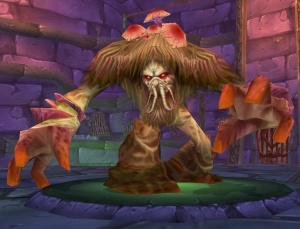
Loatheb
Loatheb is mechanically simple and really only a DPS race. Healing is extremely limited on this fight, meaning that any self-healing like bandages, healthstones, and potions are critical. You should also make use of Judgment of Light and Poison Cleansing Totem if available as he has a poison aura.
The boss uses Corrupted Mind and refreshes it, which only permits a single healing spell per minute. This applies to any cleanse as well. This means that healers should be focusing on DPSing as much as they can.
Loatheb will spawn spores every 13 seconds that can be killed for a powerful debuff. It grants Fungal Bloom, increasing crit chance by 50%, spell crit chance by 60, eliminating threat generation, and lasting 90 seconds. It can affect 5 nearby members, so you should have groups rotate killing the spore to maximize the number of members with it active.
Beyond this, the problem in the fight is his Inevitable Doom spell. He casts this after 2 minutes, which does heavy delayed shadow damage. After this, he will cast it again every 30 seconds. Once the fight reaches 5 minutes, he will cast Inevitable Doom every 15 seconds. While there is no hard Enrage mechanic, this is likely to cause a wipe due to the heavy damage that will be put out.
Simply DPS the boss down, rotating spore kills to maximize damage output. Save your self-healing items for after his third, fourth, and fifth Inevitable Doom casts.
Spider Wing
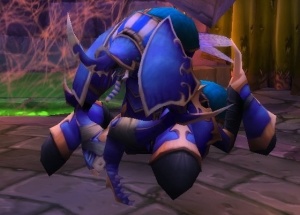
Anub’Rekhan
Anub’Rekhan is a decently challenging fight, but can be overcome with an understanding of the three core mechanics. The first mechanic involves adds, Crypt Guards, which you’ll need 4 tanks for. These are present at the start of the fight and must be killed before attacking the boss. They should be tanked where they are standing and facing away from the raid.
They apply a stacking poison, net nearby raid members, and use cleave. Have one tank take the left guard and assign two to switch off every four stacks on the right guard. Melee DPS should only be behind them. Their corpses can be exploded, which causes 10 Corpse Scarabs to spawn. 5 will also spawn upon any raider’s death. These scarabs can be CCed and should be quickly killed.
The second mechanic is Locust Swarm. This happens every 90 seconds to a minute and deals heavy AoE damage in a 30 yard radius around Anub’Rekhan. If standing in it, it will stack, silence, and quickly cause death. Before this happens, your raid (including the tank) must quickly run away to avoid dying. Because the timer is random, it must be spotted by the visual cue of the boss lifting their tail. Use any movement speed increases to get out of range when this happens.
The third mechanic is Impale. It will affect a random raid member and send a spike toward them. This will heavily damage any player that gets hit by it and knocks the target into the air. The target will take fall damage upon landing, but this can be mitigated with Slow Fall. Be ready to top off the tank when this happens as the spike will likely hit them.
Anub’Rekhan will chase after the tank, meaning that the main tank will need to kite the boss around until the effect fades. Locust Swarm also causes another Crypt Guard to spawn. It must also be killed before attacking Anub’Rekhan again. From here, the fight repeats and is a cycle of Locust Swarm, Impale, and Crypt Guard spawns. Cycle through them several times, making sure to kite well and avoid the swarm to kill Anub’Rekhan.
Grand Widow Faerlina
Grand Widow Faerlina is a pretty simple fight that should end in less than 4 minutes. You’ll notice that she has several adds arounds her to start the fight. These are crucial for helping you defeat her because they can be mind-controlled to use their silence ability on the boss.
There will be 6 adds to start the fight; 4 of them are Naxxramas Worshippers and these are the mobs that can be MCed to silence. The other 2 are followers and should be killed immediately or offtanked depending on how your guild wants to approach the fight.
Every minute, Faerlina will use Enrage, giving her significantly more damage and attack speed. It can be removed with the silence ability of a worshipper. You should MC a worshipper 10 seconds before the first Enrage to be prepared to remove it. As you only have 4 worshippers, this is what makes the fight quick because death is inevitable if you run out and don’t kill her quickly.
Beyond this, Faerlina will use two spells throughout the fight; Poison Bolt Volley and Rain of Fire. Poison Bolt Volley will hit random raid members for decent damage and apply a DoT. It can and should be cleansed to mitigate damage. Raid members should also have nature resistance potions ready. Rain of Fire drops AoE fire damage nearby. Fire resistance on your melee members is heavily recommended to ease the strain on healers.
Simply keep up the rotation of MCing and silencing Faerlina when she enrages and cleansing Poison Bolt Volley and the fight should end quickly.
Maexxna
Maexxna is an interesting fight that repeats a short cycle of mechanics. With accurate play, she is easily killed and shouldn’t take much time at all. Pull the boss and position her so that she is facing the center of her web with everyone but the main tank behind her near the edge of the room by the web wall left of the entrance. Assign two groups of ranged DPS and put them on both sides of the raid group. Have a third group of three hunters or casters also ready and closer to the wall.

After 20 seconds, Maexxna will cast Web Wrap. This shoots three random players back toward the web wall behind the raid and places them in a cocoon. You should have your third group of three hunters/casters assigned to killing the cocoons and freeing whoever is web wrapped. This will happen every 40 seconds, so the group should be prepared for the web whenever it happens.
Another spell Maexxna casts every 40 seconds is Web Spray. This will stun all raid members for 8 seconds and does a good chunk of damage. Healers should be ready to quickly top the raid off after a spray as a Web Wrap will be coming in 20 seconds. Druids and priests should apply HoTs beforehand to help as well.
Your tank will deal with two abilities. The first is Poison Shock, which does moderate damage in a frontal cone. The other is Necrotic Poison, which cuts incoming healing by 90% for 30 seconds. Necrotic Poison must be immediately cleansed to avoid a tank death. Poison Shock matters less and your healers just need to be ready for an extra heal.
The final mechanic involves add spawns. After 30 seconds, Maexxna spawns small spiders on opposite sides of the room. Your two ranged groups that are on both sides of the raid should dispatch these spiders quickly using AoE. They spawn every 40 seconds after the first wave and must be killed before a Web Spray.
From here, DPS her down, remembering to free webbed victims and cleansing Necrotic Poison. At 30% health, she will permanently Enrage and deal more damage with faster attack speed. Save both offensive and defensive cooldowns for this phase to help burst the boss down as quickly as possible. Have an offtank ready to take over in case she crits. Consider using nature resistance if damage is too high and aim for at least 15% of her health missing per each full cycle.
Death Knight Wing
Instructor Razuvious
Instructor Razuvious is quite an awkward encounter because he isn’t tanked traditionally. Instead, you’ll use a priest’s Mind Control to take control of his nearby Deathknight Understudies to hold aggro. Because of this, you’ll need at least two priests, preferably three, to ensure a constant MC tanking rotation.
When the understudies are mind controlled, they can Taunt and use Shield Wall, identical to the warrior class equivalents. Understudies do excellent damage, which means that they will hold aggro perfectly. DPS can feel free to go all out aside from switching periods when a new priest is using an understudy to grab aggro.
Before starting the fight, separate your tanks and hunters into four groups. Each should have a hunter and tank in it. Start the fight by having each hunter pull an understudy and running toward their tank. Once they are close, they should Feign Death and let the tank grab aggro. Ensure to never use Sunder Armor on the understudies!
DPS should all be near the ramp to Razuvious, ready to start dealing damage once a mind-controlled understudy begins tanking. Casters and healers should stand far away from Razuvious to avoid being damaged by Disrupting Shout, which is cast every 25 seconds, drains 4,000 mana and twice as much health, and temporarily stuns.
Have a priest start tanking with an understudy and keep it healed until MC breaks. Switch to a new priest at this point, having the designated tank picking up the MC-freed add and avoiding damaging it. Continue doing this until Razuvious dies. If an understudy ever dies, have your rogues ready to use Evasion to briefly tank until another understudy can take over.
Gothik the Harvester
Gothik the Harvester is a tedious fight that consists of two phases. You’ll need at least two priest, but four is much better. We’ll split the fight into an explanation for each phase below.

Phase One
At the beginning of the fight, Gothik is untargetable for the first 4.5 minutes. The room will be split into two, meaning that you’ll need to split your raid into two groups. Evenly divide your tanks and healers, then assign your DPS based on melee or ranged/caster. The group with melee DPS should be on the dead side, which has bone piles on the ground. Your caster/ranged group should be on the live side. Keep in mind that you will need 6 mages and priests for this encounter.
The entire phase consists of killing waves of adds that spawn regularly. Adds will appear first on the live side, which will spawn a similar add on the dead side once they are killed. You’ll need to use a mixture of CC and DPS to handle the waves that occur. The live side should focus on killing Unrelenting Riders and using Shackle Undead to CC Unrelenting Deathknights. Unrelenting Trainees take the least priority.
The dead side should focus Spectral Trainees and Spectral Riders. Spectral Deathknights should be stun-locked and Spectral Horses are the least important to focus. There will be 11 waves of trainees, 7 waves of deathknights, and 4 waves of riders. Make sure that you’re killing slowly enough to not overwhelm the dead side while ensuring that you’re ahead of wave timers.
50 seconds before Gothik lands, adds will stop spawning. At this point, you should continue keeping CC up while you wait for the boss to land. He will land on one side of the room and fight there for roughly 35 seconds before teleporting to the other room. Gothik is fairly weak, only using Shadow Bolt to deal moderate damage.
Continue burning Gothik down when he appears on each side, making sure to stay on top of CC assignments. Once he reaches 40% health, the second phase of the fight will begin.
Phase Two
Phase two is extremely simple because the middle doors will open. Ensure that all mobs are properly CCed before phase two begins and you can easily burn him down by saving cooldowns and bursting right when the doors open. While there isn’t an Enrage timer, failing to kill him in a timely manner will result in being overwhelmed by adds. Once Gothik is dead, you will need to kill the remaining adds to finish the fight.
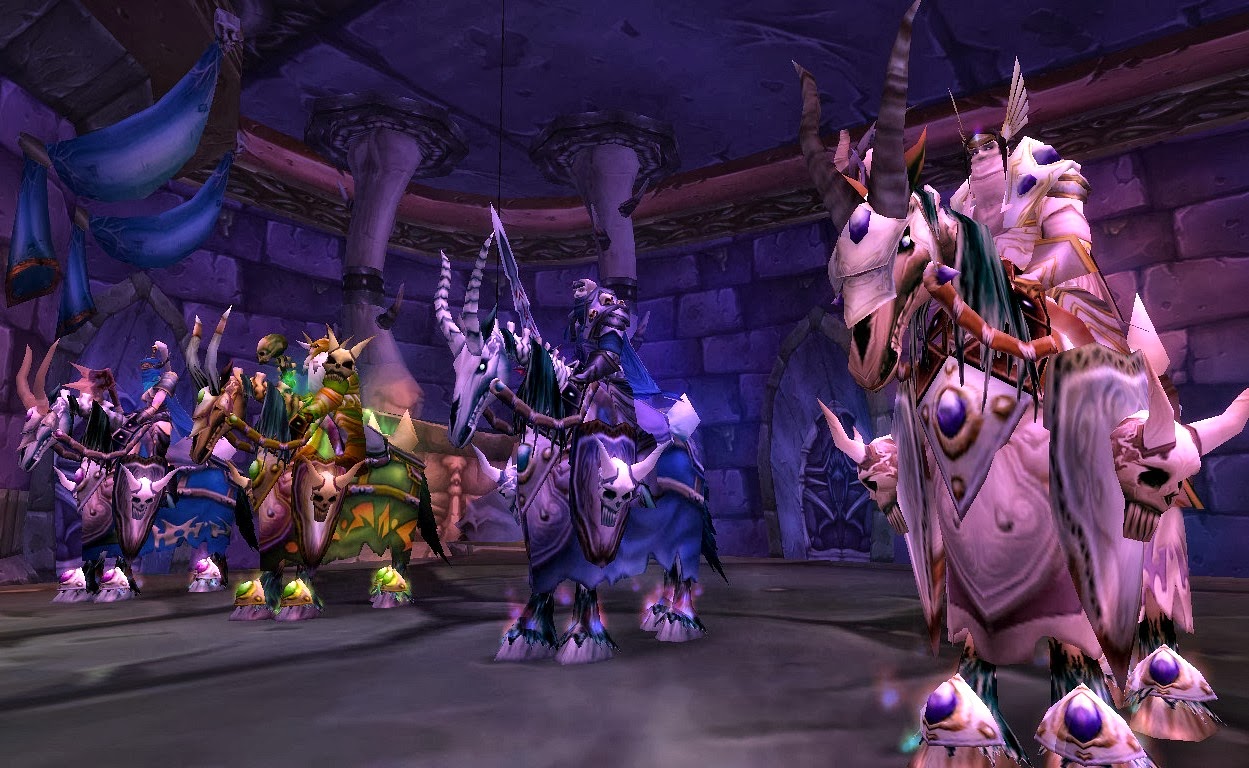
The Four Horsemen
As you might imagine, The Four Horsemen is an encounter consisting of four bosses that are, well, horsemen. While the numbers might seem daunting, individually they are fairly weak. Nonetheless, you will need four tanks to properly handle this fight. Each horsemen will be assigned to a single tank, which should be taken to a corner of the room. You should have a horseman tanked in each corner with a group of healers and DPS attacking them if done properly.
Each horseman has a unique ability and debuff mark that they will use. The groups assigned to each horseman should understand them and react accordingly. Highlord Mograine uses Righteous Fire, which simply requires your healers to be ready to provide extra healing for the debuff. Lady Blaumeux is also fairly simple, using Void Zone, which creates a damaging zone on the floor that must be avoided.
Thane Korth’azz uses Meteor, which does around 15,000 damage shared across all targets within 8 yards of the blast. The group assigned to Korth’azz will need to be grouped up to limit the damage dealt to any individual member. Finally, Sir Zeliek uses Holy Wrath, which does a small amount of damage that chains to all targets, doubling each time it chains. This group must stay 5 yards apart from each other to prevent chaining.
Each horseman also will cast a mark on the person tanking them. 20 seconds into the fight, this is applied every 12 seconds and stacks. All marks have the same effect, but they do not stack with each other (meaning you can have one of each mark). It does progressively more damage with each stack, becoming lethal around 7 stacks. It will fade after 75 seconds.
The best way to deal with this is by having your tanks ready to swap. You should have the tanks on the north side of the room swap with each other and the south side should swap. Have each tank stay for 3 stacks, then proceed to swap tanks and pick up 3 stacks of the other horsemen’s mark. At this point, the original 3 marks should fade and you can switch back to your original horsemen.
Beyond this, you’ll simply need to DPS the horsemen down so that they all die at the same time. If one dies significantly before the others, it will resurrect and you’ll need to kill it again. Also, be sure to avoid the spirit that spawns after a horseman dies. Final notes include that all horsemen can be disarmed, they will use Shield Wall for 20 seconds at 50% and 20% health, and they will Enrage after using 100 marks, which is 20 minutes into the fight.
Sapphiron and Kel’Thuzad
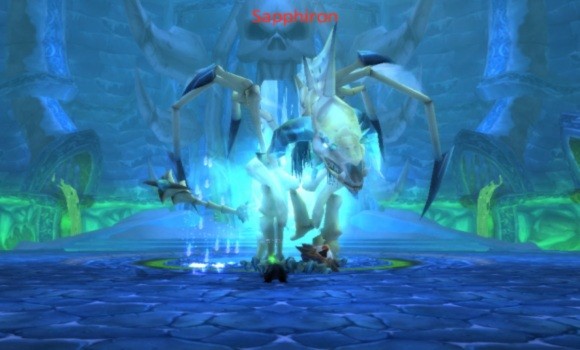
Sapphiron
Sapphiron is not a terribly hard fight, but the main issue is how much damage goes out to the raid. Because of this, having several healers, frost resistance gear, and Greater Frost Protection Potions are a must. Additionally, the boss does not take damage from frost spells, making frost mages useless. If you’re adequately prepared, the mechanics are not difficult to handle and you’ll eventually kill Sapphiron.
The fight consists of the boss fighting on the ground and taking to the air, cycling through the two rapidly. Every ground phase will last for 67 seconds, except for the first one that lasts just 45 seconds. He will use 6 abilities while in the air before returning to the ground. Your focus should be on avoiding damage during air phases and DPSing during ground phases.
The ground phase is very straightforward, but also why you need frost resistance. Sapphiron uses three abilities during this phase; Frost Aura, Life Drain, and Blizzard. Frost Aura does minor frost damage to all targets in 100 yards, but it stacks. Life Drain is a curse that is removable (and should be prioritized), draining health to heal the boss. Blizzard is similar to the mage spell, but is significantly bigger, deals heavy damage, and moves around. Raid members must move out of the Blizzard immediately to avoid a death.
The air phase is not difficult either, but there is a one-shot mechanic that will ruin any attempt. When Sapphiron first begins to fly, he will use Icebolt 5 times. This does a good amount of damage to all targets within 10 yards of the blast. More importantly, the target will be frozen for 25 seconds, rendering them immune and unable to do anything.
After the 5 Icebolt casts, he will then use Frost Breath. This is a sure one-shot, which must be avoided by hiding behind one of the 5 raid members frozen by Icebolt (frozen members are immune). After the fifth Icebolt cast, the raid should be ready to immediately hide to avoid wiping. After the breath passes, the ground phase will resume and the fight will go on as normal.
To kill the boss, continue cycling through his ground and air phases. Be quick about decursing Life Drain and avoiding Blizzard during the ground phase and make sure you’re hiding behind ice blocks during the air phase. The fight may last several minutes, but he will fall with precise execution.
Kel’Thuzad
Your final encounter will be with Kel’Thuzad and it’s a long one. There are three separate phases to the fight, the first of which he is invulnerable. We’ll split the strategy for each phase into a section below for simplicity.
Phase One
For the first part of the fight, you’ll be in the center of the room. Kel’Thuzad won’t be targetable, instead sending out waves of adds from all around the room. This phase lasts for longer than 5 minutes, meaning that you’ll kill several waves of adds. There are three adds to watch for; Soldiers of the Frozen Wastes, Unstoppable Abominations, and Soul Weavers.
Abominations use Mortal Wound, which stacks a 10% healing debuff. These should be killed quickly by your melee DPS. If Soul Weavers reach their target, they will use Wail of Souls, which does major damage and knocks three raid members backward. They should be focused and killed by ranged/casters to ensure Wail of Souls is not cast.
Finally, your ranged and casters will also need to kill Soldiers of the Frozen Wastes. These have very low health and walk toward the raid. If they hit anyone, they will use Dark Blast and do a good amount of damage to the entire raid. These must be prioritized and killed ASAP because getting hit by multiple is game over.
Phase one is all about enduring the waves of adds and ensuring that they don’t reach the raid. Kill them as quickly as possible and phase two will begin after roughly 310 seconds.
Phase Two
In phase two, Kel’Thuzad will finally attack the raid. He uses several powerful abilities, has an insane health pool, and cannot be taunted. Due to the high damage output, you need to maximize DPS so that healers don’t run out of mana before the end of the fight. This phase is very difficult and likely to cause several wipes until all raid members understand their role.
His first two abilities are a single-target and multi-target Frostbolt. The single target version focuses whoever has the most threat, has a 2 second cast time, and will almost surely kill its target. This spell must be interrupted at all times by a rotation of warriors and rogues. All melee DPS should be standing in a diamond surrounding the boss. The multi-target version is an instant cast, inflicts a slow, and hits the entire raid for moderate damage. It is cast every 15 seconds, meaning that healers will need to be prepared to top the raid off every 15 seconds.
Another spell to watch for is Mana Detonation, cast every 20 seconds. This affects a random raid member that uses mana, causing them to lose half of their mana and damage all nearby raid members. Whoever is affected by this must immediately run away from any other raid members. Alternatively, you should have ranged DPS, casters, and healers properly spread-out so that you won’t need to move.
Kel’Thuzad also uses Shadow Fissure, cast every 10 seconds. This causes a delayed eruption that will surely one-shot whoever is hit. It can be dodged by swiftly running away. Something that cannot be dodged is Frost Blast, cast every 30 seconds. This freezes a player and any raid members within 10 yards, then chaining to any raid member within 10 yards of the initial members hit. It will cause a sure death in 5 seconds if not healed, so healers must be ready to overheal whoever gets frozen by the blast.
The final and most important mechanic of the phase is Chains of Kel’Thuzad. As if the other spells weren’t enough, this ability will be used at random, but has a cooldown of a minute. When used, your tank and four raid members will be mind controlled. Offtanks must be ready for this to quickly grab aggro because the boss cannot be taunted. DPS should stop attacking to let offtanks pick the boss up.
The players that are mind-controlled should be CCed as much as possible. Make use of stuns, snares, sheeps, and anything else that limits the damage they do. Any damage they deal is increased fivefold and will heal the boss. Upon being freed, threat is dropped so the main tank cannot easily regain aggro.
With so many mechanics to watch for, phase two is very hectic and healing-intensive. Focus on spell cooldowns to understand when damage is going out so that your healers are always prepared. Remember to keep your ranged, casters, and healers spread out to avoid Mana Detonation, run away from Shadow Fissure, and stay on top of Frostbolt interrupts and you’ll surely push him to phase three, which starts at 40% health.
Phase Three
Phase three is identical to phase two, except he spawns five powerful adds that will likely remain for the rest of the fight. These are the Guardians of Icecrown, which can be taunted. You can use Shackle Undead on three of them, so make sure that your priests are always ready to apply CC when it expires.
The other two must be tanked by your offtanks. If they ever switch targets or a raid member dies, they will gain a stacking 15% damage buff. This can quickly get out of control if several raid deaths are happening. Switches may be necessary if a Chains of Kel’Thuzad occurs and an offtank needs to grab the boss.As damage only increases during this phase, save offensive and defensive cooldowns to burst through this phase. Remember to stay on top of interrupts, remain spread out, avoid Shadow Fissure, and try to keep up with spell cooldowns to know when healing is necessary. With enough practice, you should be able topple the hardest boss in the game.
About the Author