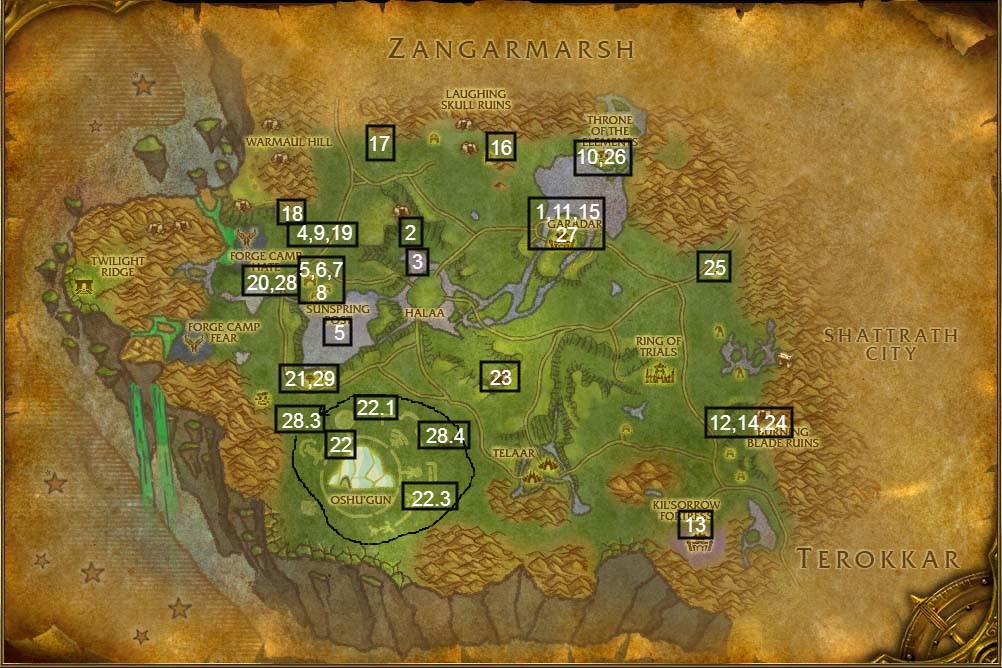
![tbc classic horde leveling guide nagrand [level 65 67]](https://www.warcrafttavern.com/wp-content/uploads/2021/11/TBC-Classic-Horde-Leveling-Guide-Nagrand-Level-65-67-1024x400.jpg)
- Author: DanielD
- Date: November 17, 2021
- Updated: November 18, 2021
- Expansion: TBC Classic


Finally, a bright, sunlit map! As soon as you enter Nagrand, you’ll want to start killing Dust Howlers until one of them drops Howling Wind (don’t ask me how that works). Right-click it to begin The Howling Wind. You should also kill Wild Elekk to collect 3 Pairs of Ivory Tusks for an upcoming quest. Make sure you don’t sell them when getting rid of junk in your bags!
Part 1
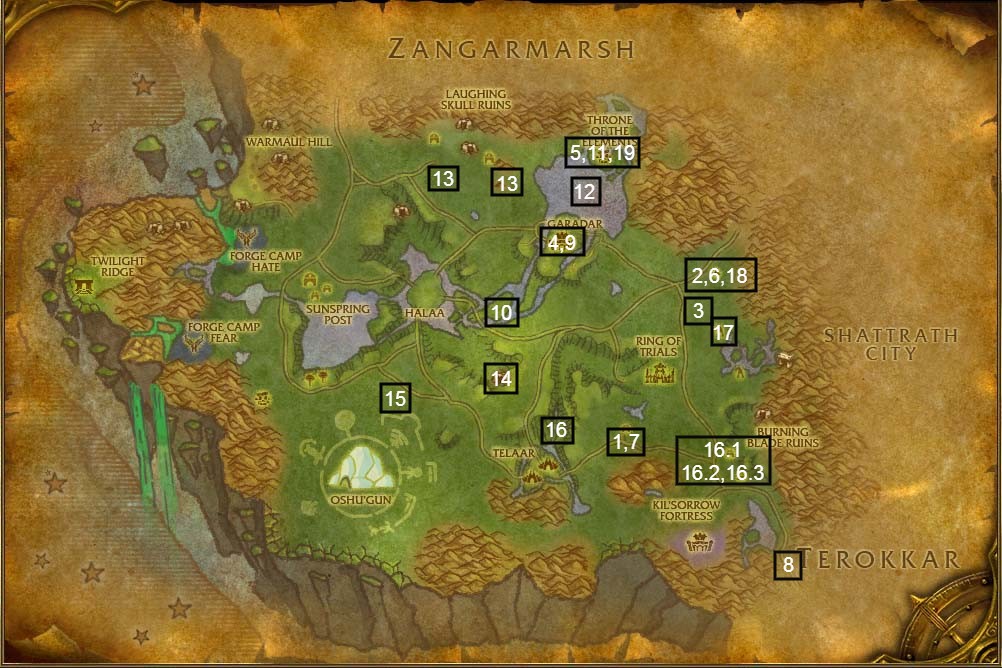
- Continue on the road northwest, taking a right at the first fork to continue north, then take a left at the next fork to head west on the road. You should soon find Wazat (61.7, 67) on the left side of the road, talk to him to accept
 I Must Have Them! From now on, make sure you’re grabbing Air Elemental Gas from any air elementals you kill.
 - Head northeast to meet up with the north-south road again, and continue north to the fork. Take a right at the next fork to reach the Nesingwary Safari (71, 40):
- Speak with Hemet Nesingwary (71.5, 40.8) to accept Clefthoof Mastery.
- Talk to Shado “Fitz” Farstrider (71.6, 40.5) to accept Windroc Mastery.
- Last, speak with Harold Lane (71.4, 40.6) to accept Talbuk Mastery.
- Speak with Hemet Nesingwary (71.5, 40.8) to accept
- You can start hunting for your mastery quests, and kill Dust Howlers as well. You should be able to find all 4 mobs around and west of the Safari. NOTE: You might see Kristen DeMeza near the safari, who you can rescue to accept (and immediately turn in
 at the Safari) I’m Saved! Eventually, one of the Dust Howlers will drop a Howling Wind; right-click it to accept The Howling Wind. You can slowly make your way west as you work on these quests, and you don’t need to complete any before continuing, just move on once you have The Howling Wind.
 - Take the road west to Garadar:
- Cross the bridge and go up the hill, then get the new flight path on your left as you enter the town.
- In the inn behind the flight master, see Matron Drakia to accept Missing Mag’hari Procession.
- Nearby, make the inn your new home.
- Head southwest from the inn to find Jorin Deadeye and accept The Impotent Leader.
- Use your reading skills on the Garadar Bulletin Board to accept Wanted: Giselda the Crone and Wanted: Zorbo the Advisor. Giselda, in addition to being wanted for murder and ritual sacrifice — which are distinct — is also wanted for burglary, go figure.
- Hammering on the signpost is Warden Bullrok, speak with him to accept Proving your Strength.
- Speak with Elementalist Yal’hah who wanders around the bonfire to accept The Throne of the Elements.
- Now go further southwest to talk to Farseer Kurkush and accept Vile Idolatry.
- Nearby, see Farseer Corhuk to accept The Missing War Party. Save them kids!
- Last, speak to Farseer Margadesh to accept Murkblood Leaders…
- Now head northeast past the inn and swim across the lake (or follow the coast north and then east) to reach the Throne of the Elements (60, 23). If you want, you can go to the area west of the Nesingwary Safari before you swim to the Throne, and kill some of the mobs for the mastery quests. Either way, once you’re at the Throne of the Elements:
- Speak to Elementalist Sharvak to turn in The Throne of the Elements.
- See Elementalist Morgh to turn in The Howling Wind, accept Murkblood Corrupters.
- Talk to Elementalist Lo’ap (60.8, 22.4) to accept A Rare Bean. (You can read about the real-life inspiration for the quest item here!) Also accept Muck Diving.
- Find Elementalist Untrag to accept The Underneath.
- Now go talk to Gordawg to turn in The Underneath, accept The Tortured Earth.
- Speak to Elementalist Sharvak to turn in
- Swim south from the throne to return to the Nesingwary Safari. We aren’t going to talk to NPCs yet, just kill stuff around the camp to complete Clefthoof Master, Windroc Mastery, and Talbuk Mastery. You might need to head further west or southwest if you clear out the area around the camp. Also kill any air elemental you see until you’ve collected 3 Air Elemental Gas, and kill Tortured Earth Spirits until you’ve finished The Tortured Earth (you can find a lot in the basin west of the Ring of Trials). You might find some Elekk to kill as well. Once you’re finished, go into the Nesingwary Safari and:
- Speak with Hemet Nesingwary to turn in Clefthoof Mastery and accept the follow up Clefthoof Mastery.
- Talk to Shado “Fitz” Farstrider to turn in Windroc Mastery and The Nesingwary Safari, accept the follow up Windroc Mastery.
- Last, speak with Harold Lane to turn in Talbuk Mastery and accept Talbuk Mastery, which isn’t confusing at all.
- Speak with Hemet Nesingwary to turn in
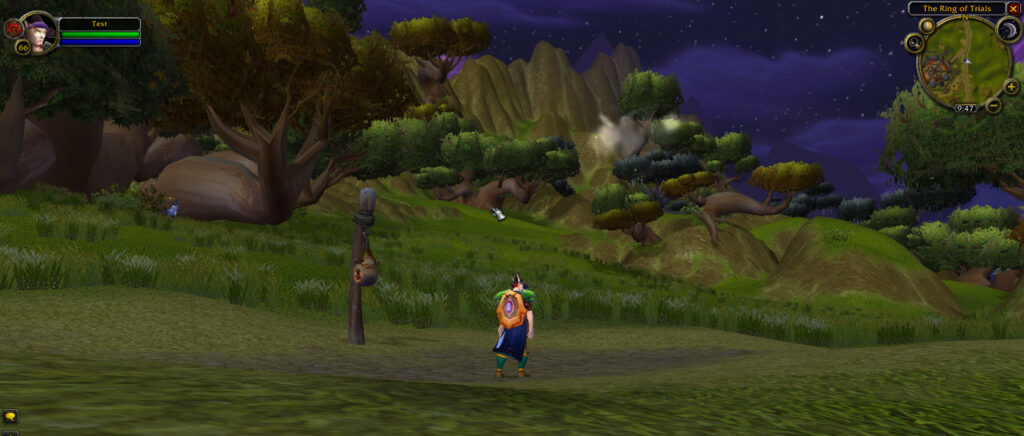
- Follow the road south past the Ring of Trials, then go southwest and find Wazat again. turn in I Must Have Them! and if you want, you can accept Bring Me The Egg! If you want, you can accept the follow-up, as it’s pretty fun (but optional), and doesn’t require any additional traveling. If you choose to accept Bring Me The Egg!, here’s some important info:
- If you’re looking for an impressive machine, don’t. The Jump-a-tron 4000 is the bit of orange cloth behind Wazat. Right click it once you’re on it.
- Using the Jump-a-tron 4000 gives you a 3 minute duration slow fall buff. Stand on the very edge of the jumpatron and make sure you’re facing the nest, then look straight down so you’re viewing your character from above. Use the Jump-a-Tron, then remove the buff once you’re just about to pass over the nest below. If you wait until you’re over the nest, your momentum will carry you past it, and you’ll fall and probably die.
- There’s another technique you can use if you have an epic mount: Get the buff, then go to the hill behind the nest using your mount. Then jump into the nest! This is, frankly, harder than using the Jump-a-tron, so try it as a last resort.
- Make sure the matriarch comes and attacks you once you’ve looted the egg, as you need to defeat her and loot her talon to complete the quest. Then you can return to Wazat and turn in Bring Me the Egg!
- Take the road east and then take a right to head south, next take a left to continue southeast and return to Terokkar Forest:
- Once you’re in Terokkar, go due south and find Kilrath (19.8, 60.9). Talk to him to turn in The Impotent Leader and accept Don’t Kill the Fat One.
- You should see the Bleeding Hollow Ruins ogre camp to the south. Head there and kill 10 Boulderfist Invaders, then get Unkor low HP. He’ll become friendly, you can talk to him and turn in Don’t Kill the Fat One, accept Success!
- Go back to Kilrath, turn in Success!, accept Because Kilrath is a Coward. I’m not sure why this quest name is so unfair to Kilrath… he’s just a scout, after all.
- Once you’re in Terokkar, go due south and find Kilrath (19.8, 60.9). Talk to him to turn in
- Hearthstone back to Garadar:
- Go southeast to the bonfire to speak with Jorin Deadeye and turn in Because Kilrath is a Coward, accept Message in a Battle.
- Talk to Elkay’gan the Mystic to accept Standards and Practices.
- Exit Garadar via the western gate, and just outside on your left, see the Consortium Recruiter to accept The Consortium Needs You!
- Go southeast to the bonfire to speak with Jorin Deadeye and turn in
- Go north from the recruiter and start killing Talbuk Thorngrazers and Cletfhoof Bulls in this area. Our real goal, however, is all the poop: search Dung piles until you’ve collected the 15 Digested Caracoli you need for A Rare Bean. If you’re RPing, you should take a dip in the lake once you’re done.
- Once you’ve finished collecting caracoli, head around or across the lake to the Throne of the Elements:
- Talk to Elementalist Lo’ap to turn in A Rare Bean, accept Agitated Spirits of Skysong.
- Talk to the rock (Gordawg) to turn in The Tortured Earth, accept Eating Damnation.
- Talk to Elementalist Lo’ap to turn in
- Go to the lake, eat one of your Nagrand Cherries (don’t think about where it came from), and kill 12 Lake Spirits. If you’re lucky you might meet Goretooth, he’s tough but he’ll probably drop blue wrists. When finished, return to Elementalist Lo’ap to turn in Agitated Spirits of Skysong and accept Blessing of Incineratus.
- Head west from the throne, and then go southwest to the area west of the lake. Stay here killing stuff until you’ve completed Talbuk Mastery and Clefthoof Mastery. Be sure to kill any Enraged Crushers you see, and collect their Core. They hang out on hills, and also in the mountains to the north. Also keep an eye out for Murkblood Invaders, who ride elekks on the road between Zangarmarsh and Garadar. At some point while farming here, start from the western gate of Garadar and take the road west and then northwest to Zangarmarsh — you should run into these guys. Kill at least one and grab their Murkblood Invasion Plans. Right-click the plans to accept Murkblood Invaders.
- Go to the area south of Garadar, and continue south and slightly west, staying on the high ground, to reach the Abandoned Armory (51, 57). Inside, find Nitrin the Learned to turn in The Master’s Grand Design? and accept Vision of the Dead. Ominous!
- Southwest of the armory, kill Ravenous Windrocs until you’ve completed Windroc Mastery. Also take out the Enraged Crushers that you can find nearby.
- Go east to cross the bridge over the Telari Basin (55, 63). Not the bridge guarded by Alliance Telaari, mind you, but the one further north (If you haven’t completed Eating Damnation yet, take a left once you’ve crossed the bridge to enter the valley and find more Enraged Crushers). Continue southeast, then take the road east to reach the Burning Blade Ruins (71.4, 68.1):
- You’ll find the First Burning Blade Pyre (72.2, 69.9) right away, use your Mag’har Battle Standard while close to it.
- Fight your way east up the mountain (when in doubt, just take the path that leads higher) to the Second Burning Blade Pyre (74.7, 69.9), plant your standard there as well.
- Keep heading east up the mountain, killin’ ogres. The Third Burning Blade Pyre (75.8, 68.3) isn’t far, use the standard near it.
- Stay here killing ogres if you haven’t yet completed Message in a Battle.
- Fight your way out of the ruins and go due north from the exit to reach Windyreed Village (72, 50). Go into each of the four huts there, stand in the middle, and then use the Living Fire in your inventory to burn down the hut. It really feels like for a hero, you sure do a lot of setting people’s stuff on fire in Outland.
- Continue north to the Nesingwary Safari:
- Speak with Hemet Nesingwary (71.5, 40.8) to turn in Clefthoof Mastery and accept the follow up Clefthoof Mastery (group).
- Talk to Shado “Fitz” Farstrider (71.6, 40.5) to turn in Windroc Mastery and accept the follow up Windroc Mastery (group).
- Last, speak with Harold Lane (71.4, 40.6) to turn in Talbuk Mastery and accept the follow up Talbuk Mastery (group).
- Note that these quests all require a group to complete successfully at this level. Once you find a group, you can hopefully complete all three at once. The locations given are approximate, as these beasts will wander a fair bit:
- Start with Gutripper at (33, 30) east of Warmaul Hill. Gutripper is too fast to kite, and is immune to roots, snares and fears.
- Next, south and slightly west to the Bach’lor at (26, 52), east of Forge Camp Fear. Make sure you pull him away from his herd!
- Then, southeast to to Banthar at (31, 62), northwest of Telaar. The name is likely a reference to the Banthas of Star Wars.
- Note that these quests all require a group to complete successfully at this level. Once you find a group, you can hopefully complete all three at once. The locations given are approximate, as these beasts will wander a fair bit:
- Once you’ve killed all 3, go back to the safari and speak again with Hemet Nesingwary to accept The Ultimate Bloodsport. Then, you can find and kill Tusker (45, 65) just east of where you found Banthar on a hill you can see on your map. Are you a poacher now? Next time you’re near the safari, go and turn in The Ultimate Bloodsport.
- Speak with Hemet Nesingwary (71.5, 40.8) to turn in
- Now go west, then north, all the way to the Throne of the Elements:
- See Elementalist Lo’ap to turn in Blessing of Incineratus, accept The Spirit Polluted.
- Talk to Gordawg to turn in Eating Damnation, accept Shattering the Veil.
- See Elementalist Lo’ap to turn in
Part 2
- Hearthstone or swim back to Garadar:
- See Elkay’gan the Mystic to turn in Standards and Practices, accept Bleeding Hollow Supply Crates.
- Talk to Jorin Deadeye to turn in Message in a Battle, accept An Audacious Advance.
- If you found the Murkblood Invasion Plans, you can talk to Garrosh to turn in Murkblood Invaders.
- If you’ve gotten 10 Obsidian Warbeads, you can speak with Warden Bullrok and turn in Proving your Strength.
- See Elkay’gan the Mystic to turn in
- Take the road west out of Garadar, and take a right at the fork, then take a left before the small bridge to head down into the Halaa basin. Once you’re in the basin, take a right and stick to the edge of the cliff to find Northwind Cleft (41.5, 35.5). Kill ogres and grab all the crates outside, and then enter the cave. Stay here killing ogres and collecting crates until you’ve completed An Audacious Advance and Bleeding Hollow Supply Crates.
- Leave that cave, which probably smells terrible, and start killing Muck Spawns. They are in the water all around the basin; kill until you collect 5 Muck-ridden Cores.
- Exit the basin via the western path and continue east to reach the Mag’hari Procession (32, 36) just north of the fork:
- Speak with Elder Ungriz to accept Finding the Survivors.
- See Saurfang the Younger to turn in The Missing War Party, accept Once Were Warriors.
- Talk to Elder Yorley to turn in Missing Mag’hari Procession, accept War on the Warmaul.
- Speak with Elder Ungriz to accept
- Go south, and continue south at the fork of the road to reach Sunspring Post. Kill murkbloods as you go through the camp to reach Sunspring Lake. You can use another Nagrand Cherry if you want, and then stay in the lake until you’ve killed 10 Lake Surgers as well as Watoosun’s Polluted Essence (which you can find in the middle of the lake, 33, 51) for The Spirit Polluted. While you’re in the lake, start asking in chat if anyone wants to group for The Totem of Kardash.
- Back on land in Sunspring Post, clear mobs to reach the main building (31, 42). Inside, find/kill Ortor of Murkblood and make sure to grab his head.
- Next, go south of the main building to the small ruined house (31, 44). Inside you’ll see a Mag’har Captive — kill the guards and then kill any mobs that remain around the ruined house. Get full/hp mana, then speak with captive and accept The Totem of Kar’dash to begin the escort quest ASAP, or you might have to deal with respawning mobs during the quest. The first ambush gives you just enough time to heal/drink afterwards, but save your big cooldowns for the 2nd ambush. Focus the Murkblood Putrifiers down first during this part. This quest isn’t part of a chain we’re doing here, so if you can’t get help and can’t beat it, skip it for now.
- Stay in Sunspring Post killing murkbloods until you’ve finished Murkblood Corrupters, Once Were Warriors, and Vile Idolatry.
- Go north to return to the Mag’hari Procession and speak with Saurfang the Younger to turn in Once Were Warriors, accept He Will Walk The Earth…
- Now go all the way across the map northeast to reach the Throne of the Elements:
- See Elementalist Lo’ap to turn in The Spirit Polluted and Muck Diving.
- Talk to Elementalist Morgh to turn in Murkblood Corrupters.
- See Elementalist Lo’ap to turn in
- Save your hearthstone if you’re close to level 66, and head back to Garadar:
- Speak with Garrosh to turn in The Totem of Kar’dash.
- Talk to Jorin Deadeye to turn in An Audacious Advance, accept Diplomatic Measures.
- See Elkay’gan the Mystic to turn in Bleeding Hollow Supply Crates.
- Speak to Farseer Kurkush to turn in Vile Idolatry.
- Talk with Farseer Corhuk to turn in He Will Walk The Earth…
- Find Farseer Margadesh to turn in Murkblood Leaders…
- Speak with Garrosh to turn in
- Leave Garadar heading east (check to the north of the road for elekk), and follow the road southeast and then south to reach the Burning Blade Ruins once more. Kill ogres (they deserve it), but mostly make your way to Lantresor of the Blade (73.8, 62.6) at the northern end of the ruins. To reach him, you’ll need to go east up the mountain as you did for the previous quest, then take a left when you see the large stone arch with the black banners. You’ll need to pick the dialogue option, then turn in Diplomatic Measures, accept Armaments for Deception and Ruthless Cunning.
- Though you’ll probably want to clear the ogres for the XP and the rep with the Mag’har (plus the Obsidian Warbeads), there is another way to reach Lantresor:
Looking east from the ring of trials, head to the tree at (75, 60) under the cursor 
Go right past the tree and up the small path (it can be tricky, jump and move horizontally until you can get up) 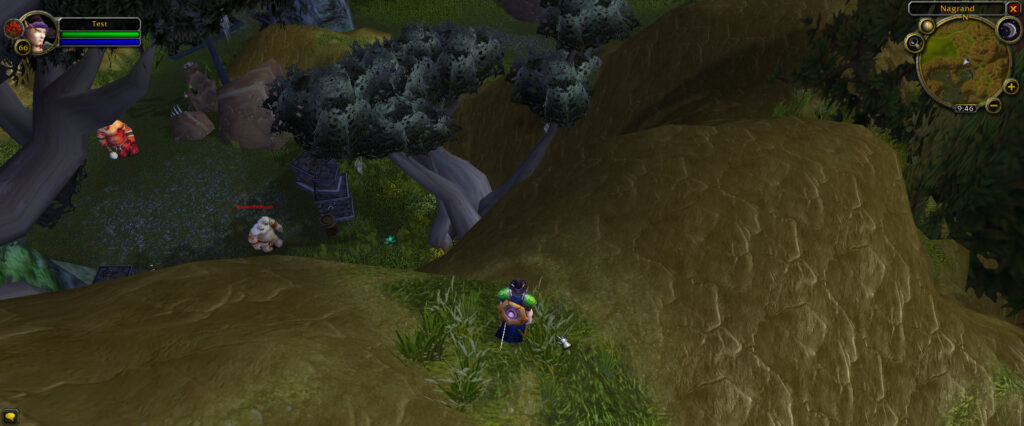
Tada! 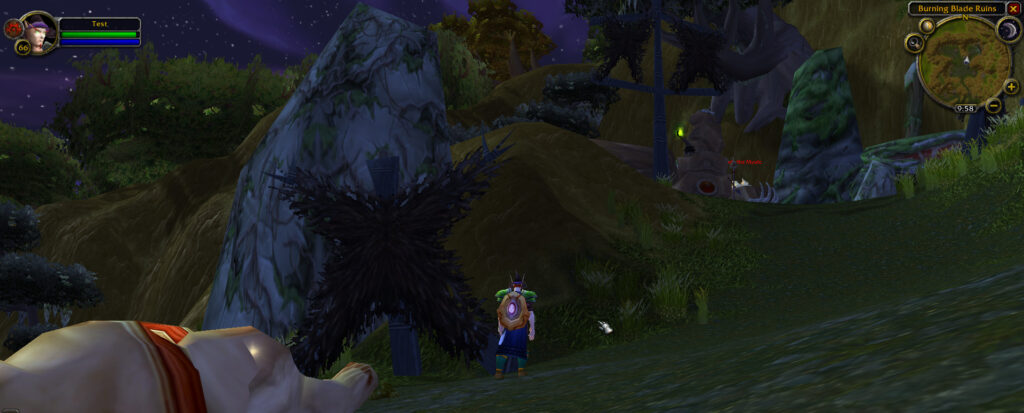
You can exit by going east a bit from Lantresor and then going up this incline


- Leave the ruins and take the road south, then at the fork go right to reach Kil’sorrow Fortress (70, 76):
- Complete Wanted: Giselda the Crone by killing 15 of any kind of Kil’sorrow Agent, and killing Giselda herself — she is in the main building in the south of the fortress.
- You’ll need to plant Warmaul Ogre Banners on Kil’sorrow Agent corpses (use them when near a corpse).
- Collect 20 Kil’sorrow Armaments.
- Complete
- Now return to Lantresor in the Burning Blade Ruins and turn in Armaments for Deception and Ruthless Cunning, accept Body of Evidence and Returning the Favor.
- Take the road north and then northwest to return to Garadar:
- See Waren Bullrok to turn in Wanted: Giselda the Crone.
- Just north of the bonfire, talk to Matron Celestine to accept He Called Himself Altruis… (note that you’ll need to be level 66 to pick this up).
- See Waren Bullrok to turn in
- Leave Garadar heading west, then go northwest to reach the Laughing Skull Ruins (50, 22):
- While here, you’ll need to plant a Kil’sorrow Banner on any ogre you kill until you’ve done so 20 times.
- If you turn right at the entrance, you’ll see the Blazing Warmaul Pyre (46.6, 24.4). Use the Damp Woolen Blanket on it. This will spawn two ogre buddies, protect them until they’re finished with their biz. Note that you can reuse the Damp Blanket to summon them again, and then kite mobs into the ogres that spawn; useful to farm this area.
- Now kill ogres as you go north to the cave at (46, 19) up in the mountains (not to be confused with the small cave near the pyre). Find Zorbo the Advisor there, and end him. Stay here in the ruins until you’ve killed the other mobs you need for Wanted: Zorbo the Advisor.
- Now is also a good time to try to get a group for the Ring of Blood (see Nagrand extra XP section below), and/or look for a group for the final mastery quests you got from the Nesingwary Safari NPCs. If you really want to do either of these activities, you can stay here grinding on ogres as they give decent rep and loot. Aldor players should instead go grind at Kil’sorrow Fortress.
- Go west from the ruins and at around (37, 19) start killing Greater Windrocs until one drops a Flawless Greater Windroc Beak, and also kill Aged Clefthoofs until you get Aged Clefthoof Blubber. If you’ve cleared this area with no luck, make your way further west to (33, 22) and try again. Keep going even if you don’t get either item here.
- At this point you’ll be just east of Warmaul Hill. Go south hugging the mountain on your right, continue to look for the drops from step 17 if you need them. Find the path to your right (29.5, 32) to enter Warmaul Hill:
- Look for a Mountain Gronn, kill it, and take it’s eyeball. If you aren’t comfortable soloing one, head up the path and try to find a gronn that’s fighting ogres. It should win, and will be low HP and ready for death.
- Continue up the path and kill ogres, who will drop Warmaul Prison Keys. Kill ogres and free Mag’har prisoners until you complete Finding the Survivors and War on the Warmaul. Make sure you only open cages that have prisoners inside! Also make sure you have 10 Obsidian Warbeads before you leave. Note that there are multiple plateaus, so you’ll need to keep heading up the mountain after you clear the first one.
- Leave the hill, and continue looking for Greater Windrocs and Aged Clefthoofs if you haven’t gotten their drops for Vision of the Dead as you head south to the Mag’hari Procession.
- Speak with Elder Ungriz to turn in Finding the Survivors.
- Talk to Elder Yorley to turn in War on the Warmaul, accept Cho’war the Pillager.
- Speak with Elder Ungriz to turn in
- Take the road southwest and find Altruis the Sufferer (27.4, 43) on your right just before the bridge. Talk to him to turn in He Called Himself Altruis… and accept Survey the Land. After your little survey ride, exhaust your dialogue options with Altruis and then turn in Survey the Land. The rest of this chain is soloable, but it can be really hard for most classes, most of the time. If you’re questing in a group, go for it if you want, but we’re skipping it in this guide.
- Wave goodbye to Altruis (he won’t notice) and take the road south to Aeris Landing:
- Talk to Zerid and accept Matters of Security and Gava’xi.
- Talk to Shadrek to accept A Head Full of Ivory. If you don’t have the 3 Pairs of Ivory Tusks you need, just get them when you can, we’ll come back here in a few steps. If you do have them, turn in the quest! Note that it is repeatable, so hopefully you can turn it in a few times.
- Talk with Gezhe to turn in The Consortium Needs You! and accept Stealing from Thieves. Note that this quest will also only be available if you’re still neutral with the Consortium.
- Talk to Zerid and accept
- Head south and slightly east towards the big mountain Oshu’Gun (pronounced aw-SHOO-goon, in case you want to impress or annoy your friends). We’re going to make a loop around the mountain, and while doing so complete the following:
- Start looking for a group to kill Banthar (roams near 37, 59) for Clefthoof Mastery, if you haven’t done it. You can try to solo him if you want, I believe in you.
- Find 10 Oshu’gun Crystal Fragments for Stealing from Thieves. They can be found at the base of the mountain as well as the smaller crystal formations that surround it. You should be able to find some near Gava’xi’s spawn point as well.
- Slay Gava’xi, he spawns on a hill at (43, 74) but will wander around the area after he spawns.
- Look for Wild Elekk, and kill them until you’ve collected 3 Pair of Ivory Tusks for A Head Full of Ivory (f you did this once, you can do it again, but it only gets you Consortium rep).
- Find (and kill) 12 Voidspawn for Matters of Security.
- Find Shattered Rumblers — they spawn all around the southern edge of the map, and west of the mountain in the hills. You might want to put Gordawg’s Boulder in action bar for this bit. Once near a rumbler (but not too near), throw Gordawg’s Boulder at it, and they will break into Minions of Gurok. You can stay back and pull them one at a time if you do this right. Kill 30 of the little minions for Shattering the Veil.
- If you haven’t yet gotten the Aged Clefthoof Blubber for Vision of the Dead, kill Aged Clefthoofs in this area until you get that dang thang! They roam around the southern and western sides of Oshu’gun.
- If you never grabbed the Murkblood Invasion Plans and accepted Murkblood Invaders, there’s another group of mounted Murkbloods that ride the road past Aeries Landing, so keep an eye out for them.
- Start looking for a group to kill Banthar (roams near 37, 59) for
- Once you’ve completed your loop and finished all the tasks above, go northeast to reach the Abandoned Armory (51.7, 56.9). Speak with Nitrin the Learned to turn in Vision of the Dead. You can also accept Levixus the Soul Caller if you want, he hangs out at Auchindoun and you’ll need to either get a group or cheese him into NPCs to defeat him.
- Head east and cross the bridge over the basin, then go east to the Burning Blade Ruins and once again find Lantresor in the northernmost section. Speak with him to turn in Body of Evidence and Returning the Favor, accept Message to Garadar. It will forever be a mystery why Lantresor was OK with you slaughtering his people every time you came to see him.
- If you’ve completed the final mastery quests for the Nesingwary Safari, you can go north and turn those in now and accept The Ultimate Bloodsport. The rewards for the quest chain might easily replace your current equipment, so check out the rewards and consider finishing this chain if you weren’t planning on it. See Part 1 Step 18.3 for detailed instructions.
- Go west and then north to the Throne of the Elements and speak with Gordawg to turn in Shattering the Veil and accept Gurok the Usurper.
- Go southwest to Garadar:
- Speak with Garrosh to turn in Message to Garadar and Murkblood Invaders.
- See Warden Bullrok to turn in Wanted: Zorbo the Advisor and More Warbeads! if you’ve got any more Obsidian Warbeads, then accept Wanted: Durn the Hungerer.
- Speak with Garrosh to turn in
- Now you’ve got quite a few quests that you’ll need a group for, or at least one or two extra people. They are all in the southwest of Nagrand, so start heading towards Aeris Landing, which is south on the road from Sunspring Post. and look for a group in chat for any/all of these quests:
- Gurok the Usurper: Gurok the Usurper is on Warmaul Hill (31, 32), which lies north of Sunspring Post in the mountains to the west. Take the path up and take your first right to go on the path that leads northwest and further uphill. Kill ogres along the way as you’ll need 7 Warmaul Skulls to summon Gurok. You’ll reach a flat spot with two cave entrances. Go up the path to the left of the southern cave, stand in the middle of the summoning circle, then right click the Warmaul Skulls you collected. Gurok has a knockback so stand with your back to the mountain. Some classes could solo him, but you don’t want to waste time hiking up there to find out you can’t. Group of 3 recommended. Don’t forget to loot Gurok’s Earthen Head before you leave!
- Cho’war the Pillager: Cho’war is up on Warmual Hill as well. Take the path up and take your first right to go on the path that leads northwest and further uphill. You’ll reach a plateau, enter the northern cave (27, 18) and kill Cho’war, who is at the end of it. Don’t worry when you exit the cave the first time, keep following the path and you’ll enter it again. Cho’war can be duoed, but bring a 3rd if you can just to be safe. Grab the Head of Cho’war before you leave!
- Wanted: Durn the Hungerer: Durn does a clockwise circle around Oshu’gun, **we should put a map of the route here, here’s a link to the route **. Try catching him when he’s on the northern part of his route, so that if you die you’re close to the graveyard. As with Tusker, you can kite him to Aeris Landing, but Durn is freakin’ fast, and unless you can get him to hit the Consortium NPCs with AoE they won’t help you. Group of 3 recommended.
- The Ultimate Bloodsport: Tusker (44.2, 65.2) is on the hill visible on your map east and slightly north of Oshu’gun mountain. You’ll probably want help with this one, can be done with a duo if you both play well, though one will need to be a healer or a hunter. Can be soloed, especially if you pull Tusker into Aeris Landing. Take the Heart of Tusker back to Nesingwary.
- In Aeris Landing (31, 58):
- Talk to Zerid to turn in Matters of Security and Gava’xi.
- Speak with Gezhe to turn in Stealing from Thieves.
- Talk to Zerid to turn in
That concludes our time in Nagrand! Feel free to stay here and do the Ring of Blood, or finish up/turn in any quests you missed/skipped. When you’re ready to move on, return to Garadar, then catch a flight to Zabra’jin in Zangarmarsh.
Extra XP In Nagrand
Grinding Mobs
[WIP]
A decent place to grind mobs for xp in Nagrand is the area where you picked up the crystals around Oshu’gun. The voidspawns die easily, and the Vir’aani Raiders and Arcanists give decent XP and aren’t too tough either. If you find you aren’t as leveled as you like, the best time to do this would naturally be when you’re doing the other quests around Mt. Osho’gun.
Another option is Kil’Sorrow Fortress. [WIP]
Ring of Blood
There aren’t dungeon instances in Nagrand, but instead a fighting pit where you complete a series of quests against progressively tougher opponents. The Ring of Blood can be found in the far north of Nagrand, inside the Laughing Skull Ruins. You need to find and speak with Gurgthock (42.8, 20.6). Some notes:
- Only one group can fight in the ring at a time, so be prepared to wait and then have to scramble desperately to be the first ones to start the next fight.
- You run this like a dungeon, and will need Tank, DPS, and Healing to get through the questline. Suggested level 66+, and a party of at least 4. It’s possible with less if you have the right class combo, but not recommended.
- Whoever accepts the quest from Gurgthock will have the initial aggro from your foe, so make sure the tank is the one to accept the quest.
- If you die, don’t let go until you get quest credit for a kill! If anyone in your party leaves the ring, you fail the quest.
- All party members must have turned in the previous quest before you can take the next one.
- Don’t forget to turn in the quest before you log off or die somewhere.
Quests:
- The Ring of Blood: Brokentoe
- The Ring of Blood: The Blue Brothers
- The Ring of Blood: Rokdar the Sundered Lord
- The Ring of Blood: Skra’gath
- The Ring of Blood: The Warmaul Champion
- The Ring of Blood: The Final Challenge


About the Author


