- Author: Furious
- Date: September 19, 2019
- Updated: March 8, 2022
- Expansion: WoW Classic


Thanks for checking out our WoW Classic Guide for Blackwing Lair! Found at the peak of Blackrock Spire, Blackwing Lair (BWL) is home to the vicious dragonkin Nefarian and his army. BWL is a 40 man raid and is host to a total of eight boss encounters. It’s absolutely worth clearing weekly for the excellent gear you’ll find here, including a majority of T2 armor pieces.
Accessing the lair is simple if you’ve completed attunement, otherwise it’s quite a lengthy run. The raid itself is quite linear, but actually making your way through it will the real challenge in itself. We’ll make things a little easier for you with this guide! First things to cover are attunement and preparation, then we’ll explain the boss fights themselves.
For a full list of items that can be acquired please see our WoW Classic BWL Loot List!
Attunement
Blackwing Lair Attunement is forgiving in the sense that you don’t need to complete attunement in order to enter in the raid. Why is it important then? Because it gives you a convenient shortcut to access the entrance much quicker. Then again, you can always travel through the spire or wait for a summon from a friendly warlock.
For those interested in completing attunement, you’ll need to earn the right to use the Orb of Command. The first part is fairly simple, requiring you to kill the Scarshield Quartermaster. He can be found within Blackrock Mountain, just down the corridor on the right side of the entrance to Blackrock Spire. Once you kill him, pick up the Blackhand’s Command to start the attunement quest.
Now for the hard part. Attunement requires you to fully clear Upper Blackrock Spire to reach General Drakkisath. You must kill him to receive the Mark of Drakkisath brand. Once you’ve done so, you can then interact with the Orb of Ascension nearby to complete attunement. Now anytime you want to enter Blackwing Lair, you can just use the Orb of Command next to where you killed the Scarshield Quartermaster earlier. Great job being a prepared raider!
Raid Preparation
Before you even step into BWL, you’ll need to make sure you’re geared enough to survive. This means that you’ll need to have cleared and acquired loot from Molten Core. In addition, all raid members will need a significant amount of fire resistance. Your tanks will need as much fire resist as they can possibly get, while your melee members should aim for about 200 (150 for rogues). Everyone else must have at least 100 fire resistance to have a chance at staying alive.
Your raid composition is also very important. There are 40 spots to fill, but that doesn’t mean that you should just pick anyone. As a general rule, five of each class is safe to ensure all buffs, debuffs, and mechanics are satisfied. Beyond that, you’ll need to make sure that there are around 13-15 competent healers. The last requirement is a little odd, but you’ll also need at least five warriors to successfully kill the second boss.
To summarize:
- Fire resistance is critical. Aim towards 200 for melee (150 for rogues) and 100 for everyone else.
- Gear must be all blues and up. Gear from Molten Core is a huge bonus here.
- Try to bring five of each class (warriors are a necessity) and 13-15 total healers.
Boss Encounters (Classic Era)
Now to the fun stuff! There are eight total encounters within Blackwing Lair, but three of them (Firemaw, Ebonroc, and Flamegor) are fairly trivial compared to the other five. Even better, the first boss, Razorgore, is an intense test of your raid group’s ability to perform mechanics. Don’t be surprised if it takes you a few weeks for a full clear as your raid adjusts to the unforgiving mechanics of BWL.
Razorgore the Untamed
The first boss fight can be split into two phases; egg phase and burn phase. The egg phase comes first and is much tougher than the burn phase at the end. You’ll want to split your raid into four groups and send a team to each corner of the room. Make sure to have an even distribution of classes for each team.
Phase 1 (Egg)
The entire point of phase one is to destroy all the eggs in the room. To do this, you’ll need a few members (preferably paladins) to use the control orb on the side of the room. Pulling the enemy next to the orb will begin the encounter, kill them all as quickly as possible. Using the control orb will grant you control of Razorgore, allowing you to destroy all the eggs in the room.
While this is happening, there will consistently be adds spawning in the room. There are three different types of adds: mages, legionnaires, and dragonkins. It is a priority for each group to immediately focus and kill all mages in their corner. The other two adds should be sundered by your warriors to generate threat. Once your warriors have threat, they should begin kiting around the room, keeping distance from both adds to minimize incoming damage. Piercing Howl is incredibly useful here.
Phase 2 (Burn)
Once you’ve destroyed all the eggs, Razorgore will fully heal and beeline for whichever paladin used the orb most. They should head towards your tanks so that they can grab aggro. Razorgore needs to be positioned so that you form a triangle with the main tank, offtank, and the rest of the raid group.
This is because he will cast Conflagration in front of him, which will burn the main tank and drop all threat. Any nearby raid members will also take damage from someone under the effects of the spell. At the same time, you also need your main tank to not be right next to your main tank, instead standing at a 90° angle away so that they won’t be hit by Conflagration. Your offtank will hold aggro while your main tank is unable to move.
The rest of your raid group should be positioned behind Razorgore, aligned directly between both tanks on the other side. Once you have the proper positioning down, phase two just requires you to burn him down. If you can cleanly finish the egg phase, you won’t have an issue taking Razorgore down.
Season of Mastery Changes
- When players now enter the room with Razergore, there will be a large egg located in the center of the room. When 10 eggs are broken, an Unstable Chromatic Drake will spawn which will need to be tanked by the party’s off-tank. The Unstable Chromatic Drake will spit different elemental effects around the room during the encounter and each of these will have a different mechanic.
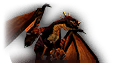
Vaelastrasz the Corrupt
Vaelastrasz is definitely much tougher than Razorgore. The fight begins once you actually speak with him. Before beginning the encounter, there are a few important things to understand.
First, this is a fairly quick fight and will be over in roughly three minutes. This aligns with the timing of Essence of the Red, an extremely powerful resource regeneration buff that is applied to the whole raid at the beginning of the encounter and fades after three minutes. Once the buff is gone, healers will not be able to keep up with the mana costs and the raid will wipe.
This means that the fight is ultimately a DPS race. However, your raid group will also need to bring as much fire resistance as possible, especially the warriors. There will be a lot of fire damage throughout the fight, so it is important to mitigate it. Don’t forget that you do have a strict time limit though, so there must be an equal balance of fire resistance and pure DPS.
Second, there will be a significant amount of deaths during the fight. Remember the point about needing five warriors? Now is the time! Every 15 seconds, Vaelastrasz will cast Burning Adrenaline, which does increase damage by 100%, but will kill the target after 20 seconds. Anyone (besides your tank) who receives the buff needs to run far away from the rest of the raid to not kill anyone when they die.
The kicker is that the spell will only be cast on classes with mana, except for every third use. Every third time he casts Burning Adrenaline, it will be on your main tank. So this means that you will absolutely have three tank deaths, but much more likely four. This is why you need to have five warriors available to tank the boss after the previous main tank dies.
Lastly, positioning is critical to successfully completing the fight. Nobody should be directly behind Vaelastrasz because he will cast Tail Sweep. Additionally, nobody should be directly next to the main tank. Your warriors will be fairly close, but not close enough so that they are hit by Flame Breath or Cleave.
The best way to position him is by having your warriors at least 90° away from the current tank, near his left shoulder. Melee DPS should be on the other side of the boss, staying in between his front and rear right legs. All casters, ranged DPS, and healers should be next to the wall directly across from the warriors (melee DPS side) on the other side of Vaelestrasz.
Now that you know these mechanics, you can start putting in some attempts. When getting Vaelastrasz into position, give the main tank 10 seconds before most DPS begins, and five seconds before offtanks begin attacking. Burn down the boss, paying careful attention to Burning Adrenaline and running away when it happens.
When Burning Adrenaline lands on one of your tanks, the warrior with the next-highest threat level should start preparing to move towards where the main tank currently is. When the tank dies, beware that Vaelastrasz will rotate left towards your warriors, putting some of your raid in position for a Tail Sweep. This is why the next tank must be quick about moving the boss back into position so DPS can calmly resume.
Keep burning Vaelastrasz down, focusing on maintaining tight positioning to avoid any unnecessary damage from Cleave, Fire Breath, and Tail Sweep. Once the boss is at 10% health, both rogues and hunters should stop attacking for 10 seconds and use their threat dropping abilities (Feign Death, Feint, and even Vanish) on cooldown. You should finish the fight within three minutes if you execute your positioning, tank swaps, and not splashing Burning Adrenaline well.
Season of Mastery Changes
- Originally, when Burning Adrenaline was casted, it was done once to a random member of the raid and it did not stack. However, it has been re-worked for Season Of Mastery. It is now a stacking debuff that will give you more haste and more damage but deals more and more damage over time until you eventually die.
Broodlord Lashlayer
After having two unforgivingly intense boss fights, things get a little easier with Broodlord Lashlayer. Most of the difficulty in the fight is actually reaching the boss, which requires some finesse. This is because there are a few suppression rooms leading up to him, both filled with Suppression Devices.
These are incredibly hazardous because they create Suppression Aura, which will slow all nearby raid members within 20 yards by 80% and reduce both melee and spell casts by 80% as well. Basically it will feel like you’re moving through really thick syrup, while the enemies around you don’t mind it at all.
It isn’t the devices themselves that are the problem, but more the fact that you also need to kill a good amount of mobs along the way. Each device is guarded by fairly weak whelps that should be killed via AOE spells from your casters. These whelps will respawn after 30 seconds, so you must move quickly between traps.
The devices can be turned off by rogues using Disarm Trap. Throughout this whole gauntlet, your rogues should be exclusively in Stealth and using Distract to allow them to easily turn off the devices. Not only should rogues turn off the devices in the path leading forward, but you should have at least one keeping an eye on the rear. The suppression devices do respawn on a random timer, meaning you can easily get caught off guard if you don’t have a rogue looking out.
There are also some stronger mobs in the rooms, most notably Death Talon Hatchers. The hatchers respawn after 20 minutes and should be killed by hunters and melee DPS when they are close enough. In the first room full of suppression devices, you can actually pull the hatchers and humanoids out of the room for easy kills. Once you clear it, head for the hall to the southwest.
This room is tougher simply because you don’t get to pull mobs outside of it. This is when your rogues and casters are really put to the test, but it ultimately isn’t much of a challenge once your raid group gets the hang of it. You’ll need to head to southeast of the room to prepare for your fight with Broodlord Lashlayer.
To properly set the fight up, you should have your main tank pull the boss and head to the corner of the nearest alcove. At this time, it is very important that no DPS is applied so that your main tank can generate a decent amount of threat. Your offtanks (or warriors) will also come along (two should do) and start building threat after a few seconds. They should again be 90° away from your primary tank to avoid Cleave.
During this time, the rest of your raid should be killing the last of the whelps that respawned, then heading for the gate. Roughly 30 seconds after the initial pull, DPS can then begin attacking Broodlord Lashlayer. Threat is a massive problem throughout the fight and your DPSers must be proactive about gradually dealing damage as not to build too much threat. Any class with threat-reducing abilities and/or talents should bring them for this fight and make sure to use them on cooldown.
The biggest problem with the fight is Knock Away, which will be used frequently and will reduce the threat of your current tank by half. Anytime Knock Away does happen, your tank with the next-highest level of threat should move to where the previous main tank was. Your DPSers should also stop attacking for a few seconds to help manage threat between tank swaps.
This fight is definitely not a DPS race and instead should be taken slow and steady. DPS should not go crazy about using cooldowns or trying to top the damage meters. Anytime your DPSers take significant damage, they should run away (to get out of range for Blast Wave) and use bandages to heal themselves. Your melee DPS in particular should get comfortable weaving in and out of range every 10 seconds so that they don’t get hit by it at all.
Healers cannot freely heal raid members because they will begin to generate a lot of threat. It might be beneficial to create a healing rotation to make sure the threat levels of all your healers are fairly even throughout the fight.
One thing that is definitely important to keep an eye on is the health of the current tank. Roughly every 25 seconds, the boss will use a hypercharged Mortal Strike for more than 5,000 damage, which will also apply the healing debuff. A priest in your raid must be ready to immediately cast Power Word: Shield for a buffer to catch up and tide the tank over until the effect fades (four seconds).
Beyond that, the fight is not terribly difficult. The goal is to kill Broodlord Lashlayer before the aggro of your tanks falls below that of your casters. As long as your DPS is slow and steady, healers are being used evenly, and you don’t let tanks die after Mortal Strike, the fight should be a gradual win.
Firemaw, Ebonroc, and Flamegor
Now that you’ve made significant progress into Blackwing Lair, the next three bosses are much easier and will give you some time to relax a little bit. All three dragons are fairly similar in how the mechanics are handled, but we’ll go over specifics for each fight more below.
All three dragons can use Shadow Flame on the tank in front of them, which is lethal if you get hit with the damage-over-time effect. If you have at least two tanks with an Onyxia Scale Cloak, there won’t be much of an issue with these fights at all because that will prevent the DOT from applying. This is why it is also important to never have the raid in front of either dragon (besides tanks).
The other ability the dragons share is Wing Buffet, which deals some damage and knocks your tank back, but more importantly it reduces the amount of threat they have. Your offtank(s) will need to be ready to taunt and move into position at least five seconds before the ability is used so that they get hit by it instead of your main tank. With that in mind, make sure your main tank runs 90° away from your offtank when they take over so that they don’t get hit by it. Your tanks should aim to never have a Wing Buffet actually land on the main tank.
Season of Mastery Changes
- When encountering Firemaw, players will find that he now has a lightning shield. When a players health lowers from taking damage, they will gain a stack of Static Electricity. When a player has 10 or more of this debuff and are within 10-15 yards of another player, the debuff will unload to the other nearby members of your party like a chain lightning effect.
Firemaw
The ability unique to Firemaw is Flame Buffet. This is a gradually ramping damage spell, because it increases your vulnerability to fire damage with each additional stack that is applied. The way that the ability works is that anyone who is in line of sight of Firemaw will be hit with Flame Buffet. It is impossible to deal damage without receiving the debuff, but it does only last 20 seconds if it is not refreshed.
This means that your DPSers will constantly need to run out of line of sight when their Flame Buffet stacks start nearing 10 (but 5-7 is much safer). To help the healers out, your damage dealers must be prepared to use bandages when they are in safe zones. Healers can position themselves so that they are not in Firemaw’s line of sight, yet still able to heal the tanks.
Having three tanks is quite helpful for this fight because you’ll need an offtank to soak Wing Buffet, but you’ll also need another to give your main tank time to let their Flame Buffet stacks fall off. The best way to position Firemaw is by bringing him to the doorway where you entered. He must go far enough so that the whole raid can easily break line of sight by simply running directly to the nearby wall.
Beyond that, the fight is not very difficult. Make sure to quickly heal the tank up after casts of Shadowflame, let an offtank soak Wing Buffet, and make sure the rest of the raid is careful about letting their Flame Buffet stacks fall off.
Ebonroc
Ebonroc is much simpler to deal with because line of sight is no longer important. The ability that Ebonroc uses unlike the other drakes is Shadow of Ebonroc. This effect lasts eight seconds and will actually cause your tank to heal Ebonroc for 25,000 health anytime Ebonroc attacks him. As a side note, if your tanks have more than 200 shadow resistance, they can actually resist the spell fairly reliably.
Because this isn’t an easy feat to achieve, your offtanks will need to constantly taunt so that Ebonroc is not being healed. One of them will still need to taunt before the use of Wing Buffet so that they get hit by it instead of your main tank. You should have your main tank in front of the boss, and your two offtanks positioned 90° to the left and right. Your raid group will stand directly behind him and DPS with impunity.
Unlike Firemaw, Ebonroc should be a much quicker fight. There won’t be phases of DPSers constantly stopping attacking. As a matter of fact, the faster the fight goes the better so that your tanks aren’t overworked. Remember to soak Wing Buffet, taunt after Shadow of Ebonroc, and quickly top off your tanks after Shadow Flame and the second drake should be no problem.
Flamegor
If you thought Ebonroc was easy, then you’re going to love Flamegor. Again, line of sight is not an issue and this fight doesn’t include Shadow of Ebonroc. Instead, he will cast Frenzy, enraging him for 10 seconds. When enraged, his attack speed is dramatically increased and he will cast Fire Nova every other second. Fortunately, this is extremely easy to avoid completely because Tranquilizing Shot from your hunters will neutralize this.
Putting everything together, the fight itself is very easy because there aren’t many mechanics to handle. You will still need an offtank to soak Wing Buffet, but by now your raid group should have plenty of practice with that. Keep your tanks topped off following a Shadow Flame and have your hunters use Tranquilizing Shot in rotation and cruise through the last easy fight of the raid!
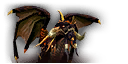
Chromaggus
The mighty drakeadon Chromaggus serves as the seventh and penultimate boss encounter in BWL. The fight mechanics are not particularly difficult, but the fight itself is quite long and requires constant and consistent execution. Before fighting, it is important to know about the three main mechanics for the encounter.
The first two mechanics are fairly similar, but there is one key difference. A unique feature of Chromaggus is that the actual abilities he chooses to use won’t always be the same from week to week. This applies only to his first spell, a breath attack that hits everyone in his line of sight (think Firemaw from earlier).
For his breath attacks, Chromaggus will only use two of five different spells each week. These spells correspond to different colors (red, green, blue, black, and bronze), which have different effects when they are used. Depending on the combination of breath attacks you have on a lockout, your Chromaggus fight can be extremely difficult or a little more manageable. It’s impossible to predict which color abilities Chromaggus will use each week, but you will definitely know after your first attempt on him.
The breath colors that he uses will remain for the rest of the week, allowing you to better strategize for the actual spells he’s using this week. For simplicity’s sake, we’ll explain what spells Chromaggus can use each week, but you’ll need to tweak your strategy a bit for whichever you end up encountering. The basic strategy will remain the same regardless of which breath colors he has, but how you end up handling them will just be a little different.
Breaths
- Red: Incinerate – Deals roughly 4,000 damage (double with black affliction on!).
- Green: Corrosive Acid – Deals about 1,000 damage every three seconds and lasts for 15 (5,000 total). It also reduces armor by 4,000-5,000.
- Blue: Frost Burn – Deals about 1,400 damage and reduces attack speed by 80%.
- Black: Ignite Flesh – Deals 750 damage every three seconds, but this breath stacks and lasts for a whole minute.
- Bronze: Time Lapse – Halves your maximum health and stuns targets for six seconds. This also dramatically reduces threat. Your health is restored after the duration.
Afflictions
- Red: Deals fire damage every three seconds and will heal the boss if you die.
- Green: Deals nature damage every five seconds and halves incoming heals.
- Blue: Slows movement speed by 70% and casting speed by 50%. Also drains 50 mana every second.
- Black: Increases fire damage you take by 100%.
- Bronze: Randomly stuns for four seconds. This lasts 10 minutes and is only removable with Hourglass Sand from trash mobs before the boss.
The last mechanic involves Frenzy, but this can also be dispelled via Tranquilizing Shot and your hunters will have just done some of this for Flamegor. The biggest difference is that Chromaggus will do this just about every 12 seconds and hits like an absolute truck if it is not dispelled immediately. As a bonus, he will also permanently enrage once he reaches 20% health and can still cast Frenzy on top of it. To put it shortly, your hunters must be on their game at all times.
With all of this in mind, the fight is indeed quite difficult. Your strategy for breath attacks should be to only let your main tank absorb them. To successfully manage this, you should fight Chromaggus in a spot so that avoiding his line of sight is easy for your entire raid. One of the best spots for this is actually at the gate to his room. His breath attacks are done every 30 seconds, so your raid will simply need to start running away from the boss to use the wall to break line of sight.
The hardest breath to deal with is definitely bronze, because it means your main tank will inevitably lose threat to a point that they can’t recover. If you end up with a bronze breath your first few weeks, your raid group just might not be able to kill him. It is doable, but there is a tighter DPS requirement.
Chromaggus can and will use all five of his afflictions on your entire raid. Removing these afflictions is an absolute priority, not only because they have very negative effects on your raid, but because having all five active at once will mutate you into an aggressive Drakonoid, rendering you useless for the rest of the fight. Everyone who can remove disease, poison, magic effects, and curses must help to ensure nobody gets mutated. Aim to keep no more than three afflictions on any raid member at a given time.
The only exception to this is the bronze affliction, which is only removeable with Hourglass Sand. As a general rule, only your tanks, healers, and hunters (for Tranq Shot) shot have and use the sand to remove the affliction. Everyone else can wait to continue dealing damage again. Because of this, it is very important that your raid has Restorative Potions to help out. Mages have it a little easier here, having the ability to use Ice Block to remove all afflictions.
The last thing to keep in mind is that Chromaggus’ skin will shimmer periodically. When this happens, he will receive more damage from magic of a specific element. This can help mages and warlocks do a little extra damage at times (or also back off to help the tank hold threat).
Putting everything together, the fight is definitely not easy. You’ll never know which breaths you’re going to encounter, but make sure only the tank absorbs them either way. Stay diligent about removing afflictions and make sure your hunters are sharp about removing Frenzy. The fight will certainly be a long one, but your raid will eventually kill him with enough effort.
Season of Mastery Changes
- Chromaggus no longer does only two random breaths but instead does them all in a random order and at 360 degrees.
- When debuffs are cleansed from members of your party, certain effects will occur during the encounter. When the green debuff is removed, a poison cloud will spit on the ground. When the bronze debuff is removed, a random player will be hit with a firework and will stun any players that are nearby. When the red debuff is removed, a patch of fire will be spawned. Lastly, when a blue debuff is removed, an ice block will spawn during the encounter. When players stand behind the ice block, they will gain a buff “hiding behind an ice block”.
- When the ice blocks are spawned, they have a very short duration before despawning. Healers will need to time the dispel of the blue debuff to help the rest of the party hide and avoid any breath effects.
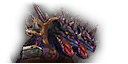
Nefarian
Now this is where things really start to get insane. To preface, the full fight will easily last more than 20 minutes. Making matters worse, you’ll need to wait 15 minutes after each failed attempt before he even respawns. Nefarian also casts some downright stupid abilities that might literally make you want to throw your keyboard out the window. As a final bonus, all raid members need an Onyxia Scale Cloak so they don’t die during the transition into phase two (although there is a small workaround).
So you’re walking into an extremely aggravating encounter that takes an absurd amount of time to complete, has a slightly flexible gear requirement, is very easy to mess up (especially later in the fight), and punishes you with a timeout after each wipe. Sounds like a lot of fun, right? Unfortunately, you must kill Nefarian if you want T2 chest pieces for your raid group, giving you access to the powerful eight-piece set bonus.
Nefarian definitely isn’t impossible, but he likely won’t be killed by casual raiding guilds simply due to the length of the fight itself being so intimidating. If you are interested in taking him down, there are three distinct phases that the fight is broken into. We’ll cover each of them below.
Phase One (Drakonids)
To start the fight, someone will need to go through Nefarian’s dialogue until he eventually stands up and starts walking around. You can’t deal any damage to him right now, but he can certainly hurt you with his shadow bolts. He will also periodically mind control and fear members of your raid. None of this is particularly deadly, but rather annoying when you also have to deal with several drakonids throughout the encounters.
Much like Chromaggus’ breath attacks, the color of drakonids you face will be different each week, pulling two from a set of five different colors. There are two doors in the boss room, one on the north side and another on the south side. Only one color of drakonids spawn from each door every week, so you can adjust accordingly after your first attempt.
In addition, there will also be a few Chromatic Drakonids during this phase, which are much stronger than their single-colored counterparts. Regardless of color, you will need to kill all of the drakonids that spawn and the chromatic baddies. Once you’ve killed 42 of them phase two will begin.
Here are the drakonids you may see:
- Red – Resists fire. Deals fire damage in a cone.
- Blue – Resists frost. Drains mana and reduces attack speed.
- Green – Resists nature. Also casts a stun.
- Black – Resists shadow and fire. Deals direct (strong) fire damage.
- Bronze – Resists arcane. Also lowers casting and attack speed.
Knowing this, red and bronze drakonids are best dealt with via AOE spells. Blue and black are killed easiest by hunters and direct damage. Green drakonids are definitely the weakest, so prioritize whichever other color appears.
Phase Two (Nefarian)
Phase one isn’t really too difficult, but it’s phase two where the gatekeeping really happens. The phase kicks off with Nefarian casting Shadow Flame on the entire raid, so everyone better be wearing an Onyxia Scale Cloak. If you don’t have one, there is one safe spot just behind Nefarian’s throne that won’t get hit by Shadow Flame. The problem with this is that you must be there before the 42nd drakonid dies to not get hit by it.
He will then land and can now be attacked. Most of his mechanics are fairly straightforward, meaning that you should never be in front of him to avoid his breath and cleave attacks. He will also use an AOE fear twice per minute, indicated by the ground shaking beforehand. If your casters and healers are more than 40 yards away, they will not be feared. Nefarian will also cast Veil of Shadow on a nearby target, which will need to be dispelled or all healing effects will be severely gimped.
What makes the fight really interesting is when Nefarian decides to antagonize a specific class in your raid group. He can call out any class in your raid, which will result in some very negative effects for all corresponding raid members of the class. Some are far more impactful than others (hunters), but they must all be dealt with properly.
Here is what each class will suffer when Nefarian focuses on them:
- Druid – Morphed into Cat Form and unable to shapeshift.
- Hunter – Ranged weapon in hand will immediately break and lose all durability.
- Mage – Will cast Wild Polymorph on any other members of the raid regardless of where they are.
- Paladin – Places a Blessing of Protection on Nefarian.
- Priest – Any targeted, direct heals will also apply Corrupted Healing, a DoT that stacks.
- Rogue – Placed next to Nefarian and unable to move.
- Shaman – Places powerful Fire Nova and Windfury Totems for Nefarian that must be killed.
- Warlock – Summons a pair of infernals to stun the warlock and nearby raid members.
- Warrior – Swapped into Berserker Stance with double the damage taken effect and unable to swap stances.
Hunters by far have it worse here, because they must have a backup ranged weapon or have a macro setup to remove their weapon before it gets destroyed! No other class has such a detrimental and irreversible effect that renders them useless if they fail to react in time. Everything other class is fairly manageable, just make sure to kill all totems before Nefarian reaches 20% health.
Phase Three (Nefarian + Bone Constructs)
Once you do bring Nefarian below 20% health, the final phase of the fight will begin. Nefarian will summon Bone Constructs from all the drakonids that died earlier. They don’t have much health, but they do hit quite hard. They should all be AOEd down as quick as possible.
This is a lot easier with careful coordination from your mages, paladins, and warriors. Your warriors should use Shield Wall, then immediately follow up with Challenging Shout. Each warrior should wait a few seconds after the last warrior before they use their combo so that the most number of constructs will be taunted.
Your paladins should be applying Blessing of Protection to a mage so they can use AOE with impunity. They can then use Divine Shield so that they won’t die after using Holy Wrath next. Once mages are immune, they should their AOE to bring all the constructs down ASAP.
The remainder of phase three is identical to phase two. Keep an eye on the timer for whenever Nefarian decides to pick on a class, don’t stand in front of him, and remove Veil of Shadow whenever it is applied. Nefarian is undoubtedly one of the toughest fights in all of WoW Classic, but the accomplishment you’ll feel after a 25 minute coordinated effort to take his head just can’t be matched.
Season of Mastery Changes
- Adds will spawn during the add phase of the encounter rather quickly. If any player of your raid is not prepared, it can and will cause a wipe to occur. Keep in mind, the fight itself plays out like the previous Nefarian encounter but each class call out has been heavily buffed and will have a few variations added to each.
- Druid – Morphed into Cat Form and unable to shapeshift. During this class call out, Nightmare Brambles will be spawned on the ground and roam. If a member of your party is touched by one of these Nightmare Brambles, they will become rooted and take nature damage over time.
- Hunter – Ranged weapon in hand will immediately break and lose all durability. In addition to this, copies of the hunters weapon will spawn and will cast Corrupted Shot on the raid party.
- Mage – Will cast Wild Polymorph on any other members of the raid regardless of where they are. In addition to this, there will be wands that will spawn and cast Arcane Explosion over and over.
- Paladin – Places a Blessing of Protection on Nefarian. In addition to this, there will be several swords that will spawn and cast Concecration around the room.
- Priest – Any targeted, direct heals will also apply Corrupted Healing, a DoT that stacks. In addition to this, there will be several shadow orbs that will spawn and cast Mid Flay on nearby players.
- Rogue – Placed next to Nefarian and unable to move. In addition to this, several copies of the Rogue’s weapon will spawn as Corrupted Weapons and cast Corrupted Weapon.
- Shaman – Places powerful Fire Nova and Windfury Totems for Nefarian that must be killed. In addition to this, Bouncing Bolt will spawn and begin bouncing around the room. Any player near the bouncing bolt will receive the debuff Pule Lightning.
- Warlock – Summons a pair of infernals to stun the warlock and nearby raid members. In addition to this, Warlocks will spawn shadow orbs that cast Corrupted Coils that travel in random directions.
- Warrior – Swapped into Berserker Stance with double the damage taken effect and unable to swap stances. In addition to this, several copies of the Warriors weapon will spawn as a Corrupted Weapon and have the ability to cast Charge and Corrupted Slam.
About the Author


“Fire resistance is critical. Aim towards 200 for melee (150 for rogues) and 100 for everyone else.”
Why 150 for rogues? can you elaborate?